 how-to
How to Calculate Pipe and Drape Needed
Table of Contents
- Step 1: Measure Your Event Space
- Step 2: How to Measure Venue Ceiling Height for Draping
- Step 3: Understand Drape Fullness Ratio Explained
- Step 4: Calculate Total Drape Width and Panels Needed
- Step 5: Pipe and Drape Hardware Components to Account For
- Step 6: Select Fabric Weight and Type for Your Setup
- Common Mistakes to Avoid When Calculating Pipe and Drape Needed
- Frequently Asked Questions
Last Updated: September 18, 2026
Step 1: Measure Your Event Space
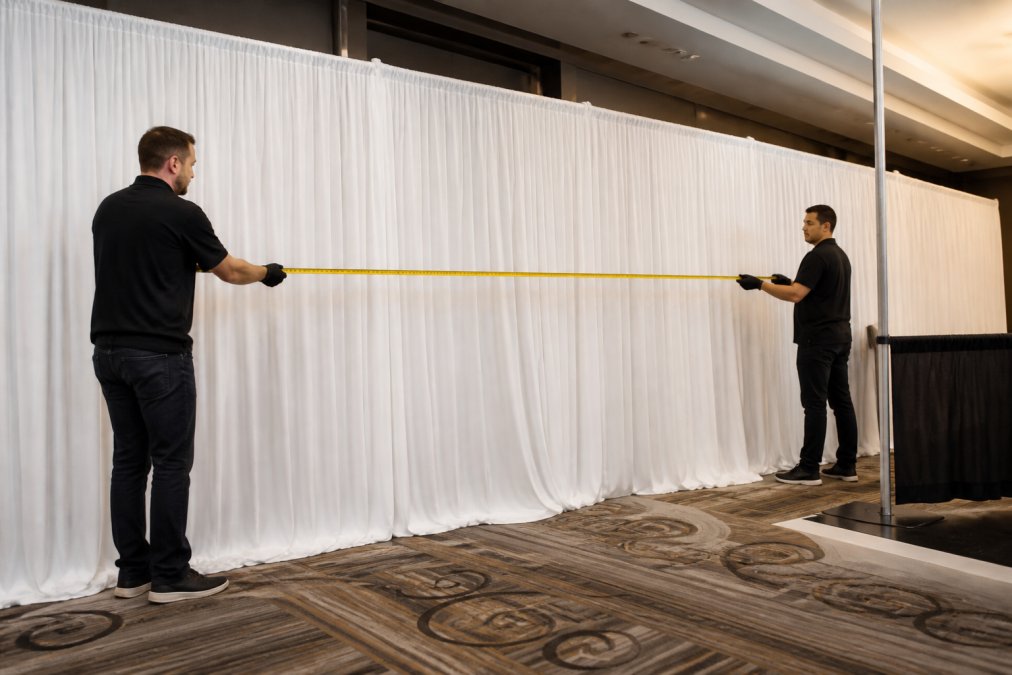
To calculate pipe and drape needed, start with accurate venue measurements. Measure the width of each area you want to drape using a tape measure; if your space is irregular, break it into sections and add them together. Identify your specific goal, covering a wall, creating a booth backdrop, or defining a stage, before measuring further, as each requires different calculations.
Step 2: How to Measure Venue Ceiling Height for Draping
Measure ceiling height at multiple points in your venue, as warehouses, lofts, and older buildings often vary. This variation matters when you calculate pipe and drape needed for the entire space. If you cannot measure directly, ask your venue manager for official specifications.
Step 3: Understand Drape Fullness Ratio Explained
Drape fullness ratio is how much fabric you need compared to the width you're covering. Professional event designers choose ratios based on specific fabric properties, venue acoustics, and visual intent.
What Fullness Ratio Means
A 1.5:1 ratio means you need 1.5 times the width of your space in fabric; 2:1 means twice the width; 2.5:1 or higher means 2.5 times or more. Higher ratios create more dramatic folds and professional appearance but cost more and require stronger hardware.
Fabric-Specific Fullness Requirements
Different fabrics drape differently due to weight, fiber structure, and natural stiffness. Choosing the wrong fullness ratio for your fabric type results in either wasted material or a disappointing visual outcome.
Fullness Ratio and Visual Appearance
Understanding how ratio translates to appearance helps you communicate your vision to rental companies and make informed decisions:
-
1.5:1 ratio: Sleek, modern appearance with minimal folds. Fabric hangs close to the frame. Works well for minimalist events, contemporary aesthetics, and heavy fabrics. Looks professional but not luxurious.
-
2:1 ratio: Classic elegant look with balanced pleating. This is the visual sweet spot for most events. Folds are visible and create depth without appearing overdone. Professional appearance suitable for any event type.
-
2.25:1 to 2.5:1 ratio: Dramatic, luxurious appearance with deep, flowing folds. Creates visual richness and sophistication. Best for high-end events, theatrical productions, and situations where drape is a design focal point rather than background.
-
3:1 or higher: Theatrical or avant-garde appearance. Folds are pronounced and create movement. Rarely used outside theatrical, fashion, or high-concept events because the visual impact can overwhelm the space.
Choosing Your Fullness Ratio: Decision Framework
Ask yourself these questions to select the right ratio:
-
What is the event type? Corporate events typically use 2:1 for professionalism. Weddings often use 2:1 to 2.25:1 for elegance. Theatrical productions may use 1.5:1 to 2:1 depending on aesthetic.
-
What fabric are you using? Match the fabric weight to the recommended range above. Do not force a 2:1 ratio onto blackout fabric or a 1.5:1 ratio onto sheer.
-
Is drape a design focal point or background? If drape is the main visual element, use a higher ratio (2.25:1+). If drape is supporting other design elements, use 2:1 or lower.
-
What is your budget? Higher ratios cost more. If budget is constrained, use a lower ratio within the acceptable range for your fabric type. A 1.5:1 velour looks better than a 2.5:1 sheer at the same total cost.
-
What is the ceiling height? Taller ceilings (14+ feet) can support higher ratios visually. Lower ceilings (8-10 feet) look better with 1.5:1 to 2:1 because excessive folds can make the space feel cramped.
-
Will lighting be used? Backlit drape benefits from higher ratios because light creates shadow definition in folds. Front-lit drape is less affected by ratio changes.
Common Fullness Mistakes
Assuming 2:1 is always correct: It is not. A 2:1 sheer looks thin; a 2:1 blackout is wasteful. Match ratio to fabric type.
Step 4: Calculate Total Drape Width and Panels Needed
To calculate pipe and drape needed, multiply your venue width by your chosen fullness ratio. For example: 40 feet × 2:1 ratio = 80 linear feet of fabric needed. Divide by your panel width (typically 4, 5, or 6 feet) to find panel count: 80 ÷ 5 = 16 panels. Break down calculations by section and create a chart to track totals.
Step 5: Pipe and Drape Hardware Components to Account For
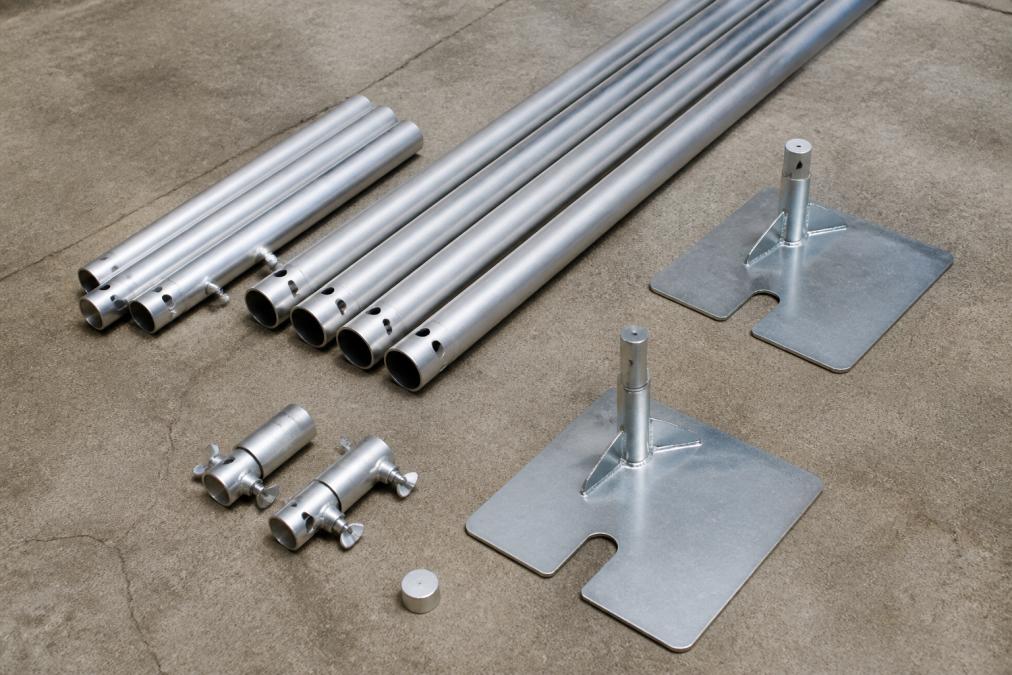
Pipe and drape systems consist of several interconnected hardware pieces that support your fabric. Understanding these components helps you estimate quantities accurately and ensures safe installation. More importantly, calculating the weight load your hardware must support prevents dangerous collapses and equipment failure.
Calculating Hardware Spacing and Upright Count
Calculate your baseline hardware needs:
- Divide total linear feet of drape by spacing distance (typically 6 feet)
- This gives you the number of uprights needed
- One crossbar spans between each pair of uprights
- Each upright needs one base plate
- Add connectors based on your specific configuration
For example, a 40-foot-wide drape setup with 6-foot upright spacing needs approximately 7 uprights, 6 crossbars, 7 base plates, and multiple connectors.
Weight Load Calculations: The Critical Safety Step
This is where most event guides stop, but professionals go further. Each base plate has a maximum weight rating, typically ranging from 50 pounds for lightweight portable systems to 150+ pounds for professional-grade equipment. Your actual weight load determines whether your hardware is adequate or dangerously undersized.
Calculate total weight load per upright:
-
Determine fabric weight per linear foot: Multiply your total fabric yardage by the fabric weight (in ounces per yard), then divide by 3 to convert to linear feet. For example, velour at 14 oz/yard covering 80 linear feet = (80 ÷ 3) × 14 = approximately 373 ounces, or 23 pounds of fabric alone.
-
Account for fullness distribution: With a 2:1 fullness ratio, fabric weight is distributed across twice the physical width. A 40-foot space with 80 linear feet of 2:1 fabric means weight is spread across 40 feet of uprights. Divide total fabric weight by the number of uprights: 23 pounds ÷ 7 uprights = approximately 3.3 pounds of fabric per upright.
-
Add hardware weight: Crossbars typically weigh 8-15 pounds depending on length and material. Connectors add 1-2 pounds per connection. A single upright supporting a 6-foot crossbar section plus connectors adds roughly 5-8 pounds of hardware weight.
-
Calculate total load per base plate: Fabric weight per upright + hardware weight per upright = total load. Using the example above: 3.3 pounds (fabric) + 6 pounds (hardware) = 9.3 pounds per base plate.
-
Apply a safety factor: Professional installations use a 2.5× to 3× safety margin. Multiply your calculated load by 2.5: 9.3 × 2.5 = 23.25 pounds. Your base plate must be rated for at least this weight.
Height and Lever-Arm Effects
Taller drape installations create additional stress on base plates through lever-arm mechanics. A 10-foot-tall drape creates more rotational force on the base plate than an 8-foot installation with the same fabric weight. As height increases, reduce upright spacing or upgrade to heavier-duty base plates. Most professionals reduce spacing from 6 feet to 5 feet when installing drapes taller than 12 feet.
Verification and Safety Protocol
Before ordering or installing:
- Calculate your total fabric weight using the method above
- Determine weight per upright by dividing by upright count
- Add estimated hardware weight (ask your rental company for exact specs)
- Multiply by 2.5× safety factor
- Verify that your base plate rating exceeds this number
- If it does not, either reduce upright spacing, upgrade to higher-rated base plates, or select lighter fabric
- Document these calculations and share them with your installation team
Step 6: Select Fabric Weight and Type for Your Setup
Fabric selection affects your calculations and visual result. Lightweight sheer or voile (2-4 oz/yard) requires less hardware and works well for ambient lighting. Medium-weight poly premier (4-8 oz/yard) offers versatility for most applications. Heavy-weight velour or blackout (10-16+ oz/yard) requires more substantial hardware and blocks light. Your fabric choice influences fullness ratio, hardware spacing, base plate capacity, and panel count.
Common Mistakes to Avoid When Calculating Pipe and Drape Needed
Common mistakes when calculating pipe and drape needed: (1) Underestimating fullness ratio, budget for 2:1 minimum, not 1.5:1. (2) Forgetting ceiling height variations, measure every section. (3) Not accounting for hardware spacing, each fabric type has recommended upright spacing. (4) Rounding down panel counts, always round up. (5) Ignoring fabric weight when selecting hardware, match hardware to fabric weight. (6) Miscalculating linear feet, measure twice and double-check. (7) Forgetting fire retardant requirements, check venue requirements before ordering. (8) Not considering traffic flow, plan layout with safety in mind.
Frequently Asked Questions
What is the standard fabric fullness ratio for event drapery?
Standard fullness ratio for pipe and drape is typically 1.5 to 2 times the span width. A 10-foot span needs 15 to 20 linear feet of fabric when gathered. Sheer fabrics often use 2:1 ratio for better light diffusion, while velour and heavier materials work well at 1.5:1. The ratio affects how much fabric bunches and the visual density of pleating.
How do I calculate how many drape panels I need?
Divide your total linear feet of fabric needed by the width of each panel (typically 4.5 feet or 5 feet per panel). For example, if you need 30 linear feet and each panel is 5 feet wide, you need 6 panels. Always round up to ensure adequate coverage. Account for overlap at seams and connectors to avoid gaps.
Does the weight of the fabric affect the pipe and drape hardware needed?
Yes. Heavier fabrics like velour require stronger base plates and uprights to support the load safely. Calculate weight load by multiplying fabric weight per linear foot by total linear feet. Lighter poly premier and sheer fabrics need less support. Always verify your hardware weight capacity matches your fabric selection to ensure installation safety.
How do I measure height and width for pipe and drape accurately?
Measure width at multiple points along the span length to account for uneven walls. Measure height from floor to ceiling or desired drape point using a laser measure or tape extended vertically. Note any obstructions, pillars, or architectural features. Document ceiling height variations across the venue, as some areas may require different drape heights for visual balance.