 how-to
How to Do Draping Step by Step
Table of Contents
- Understanding Pipe and Drape Equipment Basics
- Selecting the Right Fabric Types for Your Event
- How to Calculate Fabric for Draping
- Step-by-Step Installation Guide
- Best Pipe and Drape for Weddings
- Draping Techniques for Events
- Safety and Weight Load Calculations
- Fabric Care and Wrinkle Removal
- Frequently Asked Questions
Last Updated: October 1, 2026
Understanding Pipe and Drape Equipment Basics
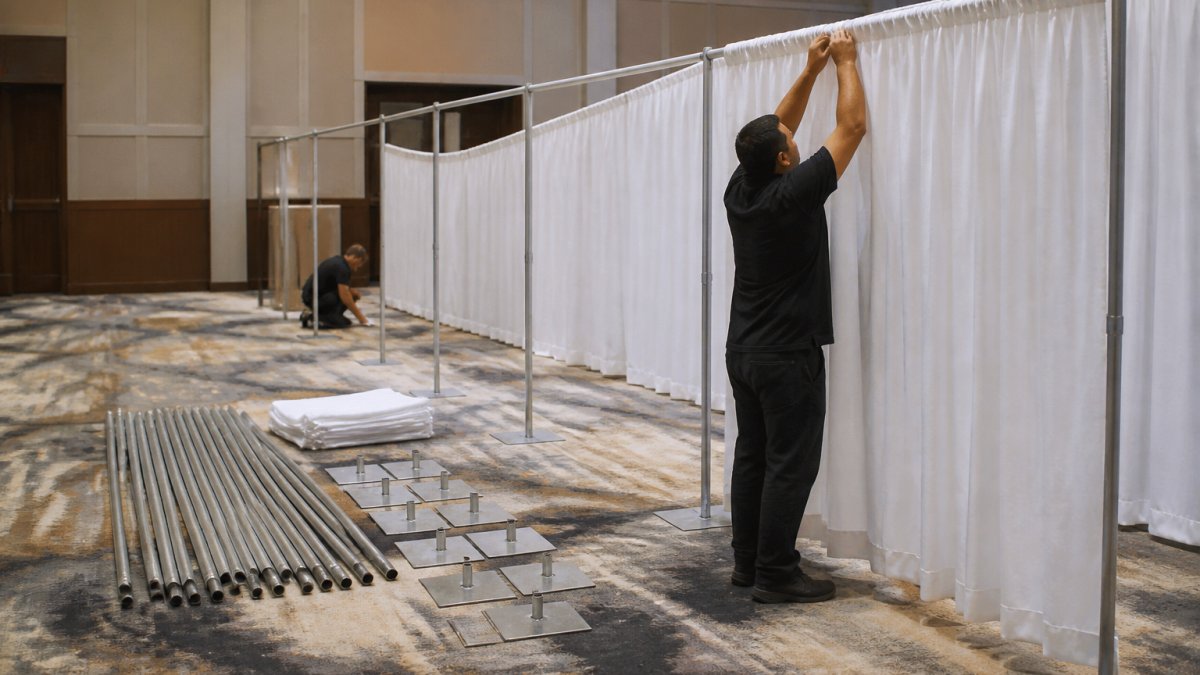
Learning how to do draping with pipe and drape systems forms the foundation of professional event backdrops and room dividers. A typical setup consists of uprights, base plates, crossbars, and attachment hardware, each serving a specific structural purpose.
Uprights are vertical poles that support the framework. Base plates anchor uprights to the floor, distributing weight evenly and preventing tipping. Crossbars run horizontally between uprights and serve as primary anchor points for fabric. Without proper assembly, draping will sag, shift, or fail.
Uprights, Base Plates, and Crossbars
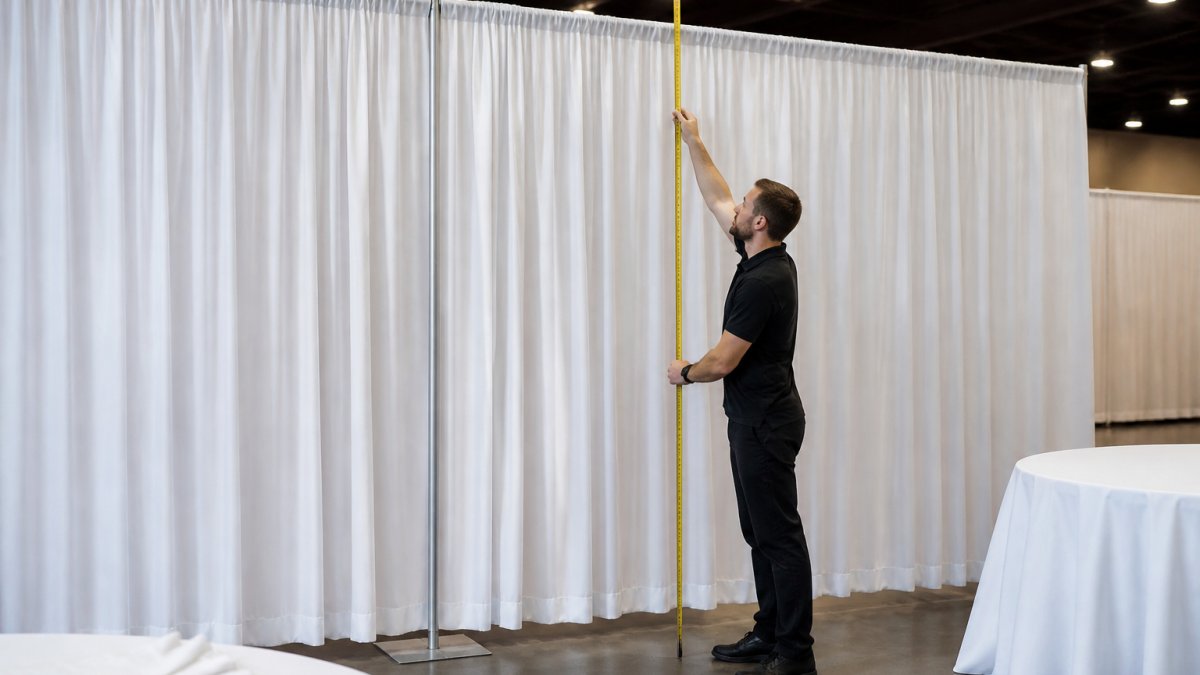
Uprights typically stand 8 to 12 feet tall for standard events, with options up to 30 feet for larger venues. Most professional uprights are aluminum or steel for their strength-to-weight ratio.
Base plates are the critical connection point between uprights and floor, typically weighted or bolted down to prevent movement. Even slight shifts cause the entire frame to lean, creating visual distortion and safety hazards. The base plate's weight capacity determines how much fabric weight the system can safely support.
Crossbars connect uprights horizontally and hold fabric, typically 6 to 10 feet long. Thicker crossbars (1.5 to 2 inches in diameter) provide better grip for clips and hardware.
Attachment Points and Hardware Assembly
Attachment points are where fabric connects to the frame. Most professional systems use C-clamps, pipe clamps, or specialized fabric clips. Pipe clamps distribute pressure across a wider area, reducing fabric damage risk.
Specialized fabric clips have rubber padding to protect fabric from tearing or creasing. Ensure all connections are tight before hanging fabric, as loose connections lead to sagging and uneven distribution. Proper tensioning remains equally critical when hanging decorative curtains to ensure the metal rings glide smoothly across the rod without catching or damaging the fabric.
Spacing between attachment points matters significantly. Industry standard is 12 to 18 inches apart, depending on fabric weight. Heavier fabrics like velvet need closer spacing; lighter sheers can use wider spacing.
Selecting the Right Fabric Types for Your Event
Fabric choice dramatically impacts visual appearance and installation ease. Different materials affect how fabric drapes, reflects light, and holds pleats.
Velvet is the most popular choice for formal events, it holds pleats beautifully and creates dramatic light absorption. Crushed velvet offers similar impact with better wrinkle resistance.
Sheer fabrics create an ethereal, light-diffusing aesthetic ideal for layered effects and venues with natural light, but show wrinkles easily and require precise manipulation.
Polyester blends offer affordability and durability with forgiving installation. Cotton-poly blends provide natural texture with wrinkle resistance.
Linen creates elegant texture but requires professional pressing. Satin creates a glossy finish that reflects light dramatically for visual interest.
Flame-retardant treatments are essential for commercial events and venues with fire code requirements. Verify that any fabric you select carries appropriate flame-retardant certification for your venue type.
How to Calculate Fabric for Draping
Calculating correct fabric quantity prevents waste and shortfalls. The calculation depends on backdrop height, width, and desired fabric manipulation, flat coverage versus elaborate pleating and swags.
For basic flat draping, multiply width by height. A 20-foot-wide, 12-foot-tall backdrop needs 240 square feet, but this assumes zero waste and no pleating.
Professional draping typically requires 1.5 to 2 times the square footage to create pleats, swags, and dimensional effects. A 20-foot by 12-foot space with professional pleating needs 360 to 480 square feet.
For ceiling drape, add 20 to 30 percent more fabric than ceiling dimensions. A 40-foot by 60-foot ceiling typically needs 2,400 to 2,880 square feet when professionally installed.
Double-layer draping requires double the base calculation plus 15 to 20 percent for proper layering and tension. Request a quote with your dimensions and desired style for precise estimates.
Step-by-Step Installation Guide
Understanding how to do draping requires systematic assembly to ensure safety and visual quality during professional installation. This section walks through the complete process from frame assembly through final fabric positioning.
Step 1: Assemble the Backdrop Frame
Lay out all components on a clear surface and inspect for damage. Damaged uprights or bent crossbars must be replaced.
Connect base plates to uprights first, ensuring tight connections. Position base plates at least 2 feet apart for stability.
Insert crossbars into upright tops using connector sleeves. Ensure crossbars are level with a spirit level, as unlevel crossbars cause uneven sagging.
Verify all connections are secure by gently shaking the frame. Any movement indicates loose connections that must be tightened.
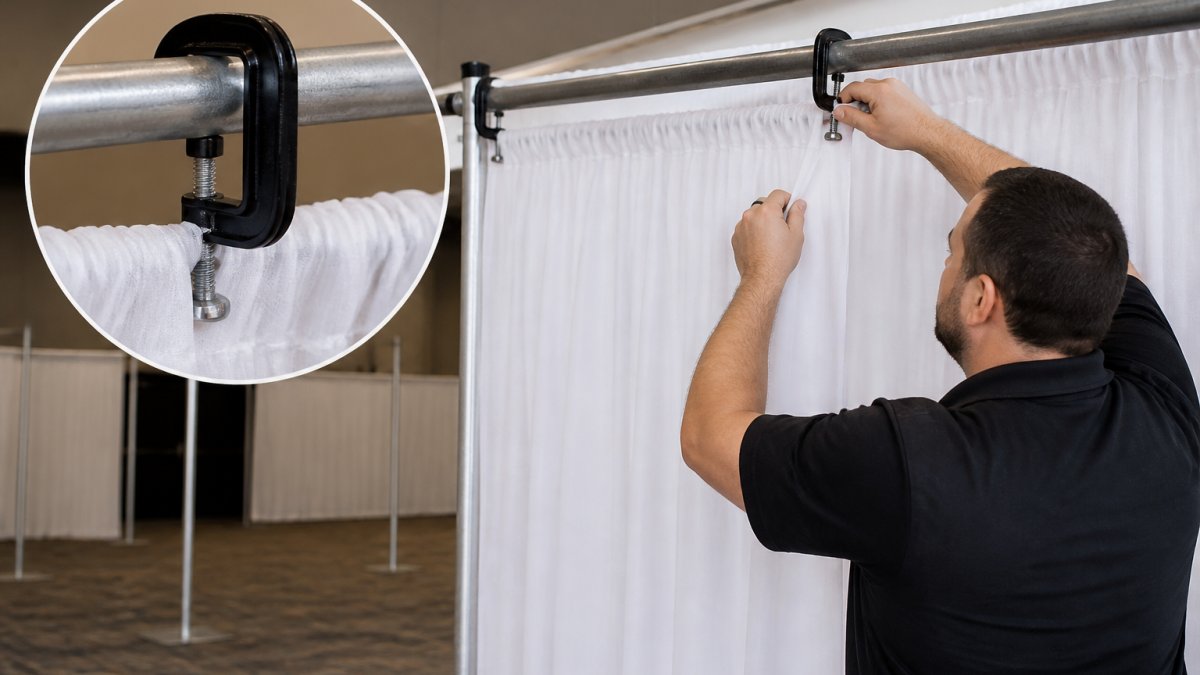
Step 2: Secure Fabric to Crossbars
Unroll fabric and inspect for wrinkles or damage. Steam or press before installation if needed. Begin at one end of the crossbar and work systematically across.
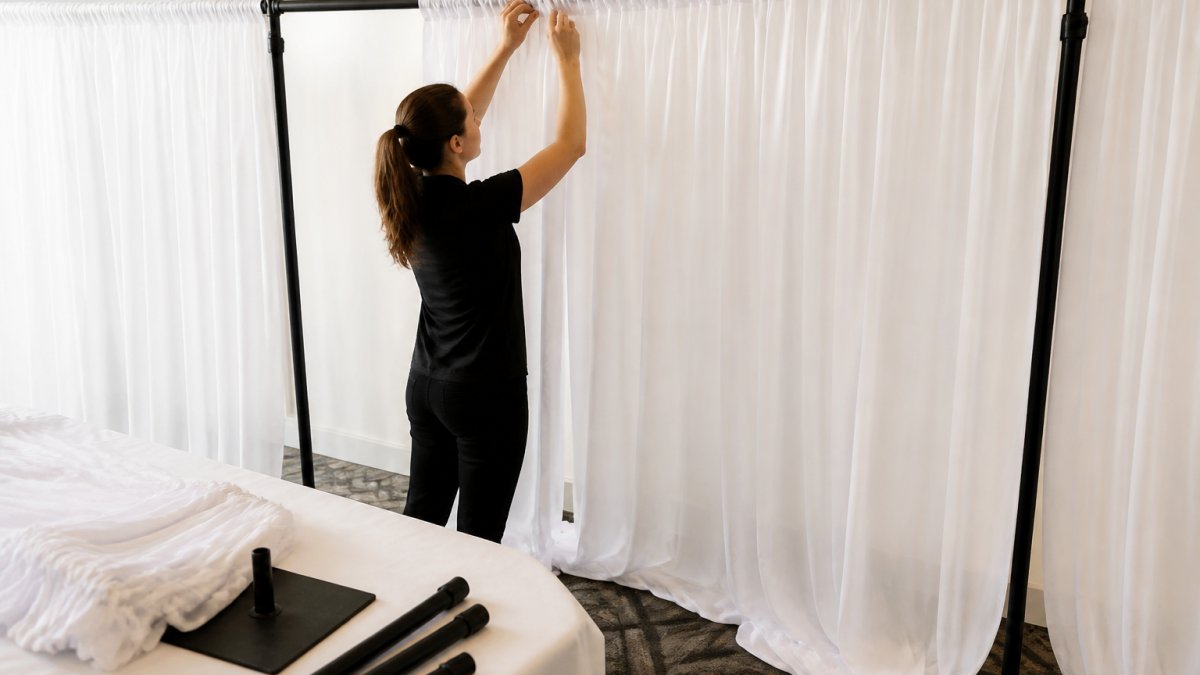
Attach the first clip at the center of the crossbar to prevent shifting. Then attach clips outward in both directions, spacing them 12 to 18 inches apart depending on fabric weight.
Maintain consistent tension on the fabric, snug but not strained. Uneven tension creates visible wrinkles. Add clips if sagging appears between attachment points.
For double-layer draping, attach the back layer first, then overlay the front layer with slightly offset clips. This adds visual depth and allows light interaction.
Step 3: Create Pleats and Swags
Pinch pleating is the most common technique: manually fold fabric into even vertical pleats and secure each fold with clips or pins.
Measure the distance between outer attachment points and divide by desired pleat count. Mark intervals lightly with tape or fabric marker.
Create each pleat by pinching fabric at marked intervals and securing with a clip. Shallow pleats (2-3 inches) create subtle texture; deep pleats (6-12 inches) create dramatic effect.
Swags are curved fabric sections that hang between attachment points. Create swags by gathering fabric at two points and allowing natural hang. Sag depth should be approximately 12 to 18 inches for every 4 feet of width.
Best Pipe and Drape for Weddings
Velvet and crushed velvet remain top choices for formal wedding backdrops, they create dramatic, sophisticated aesthetics that photograph beautifully.
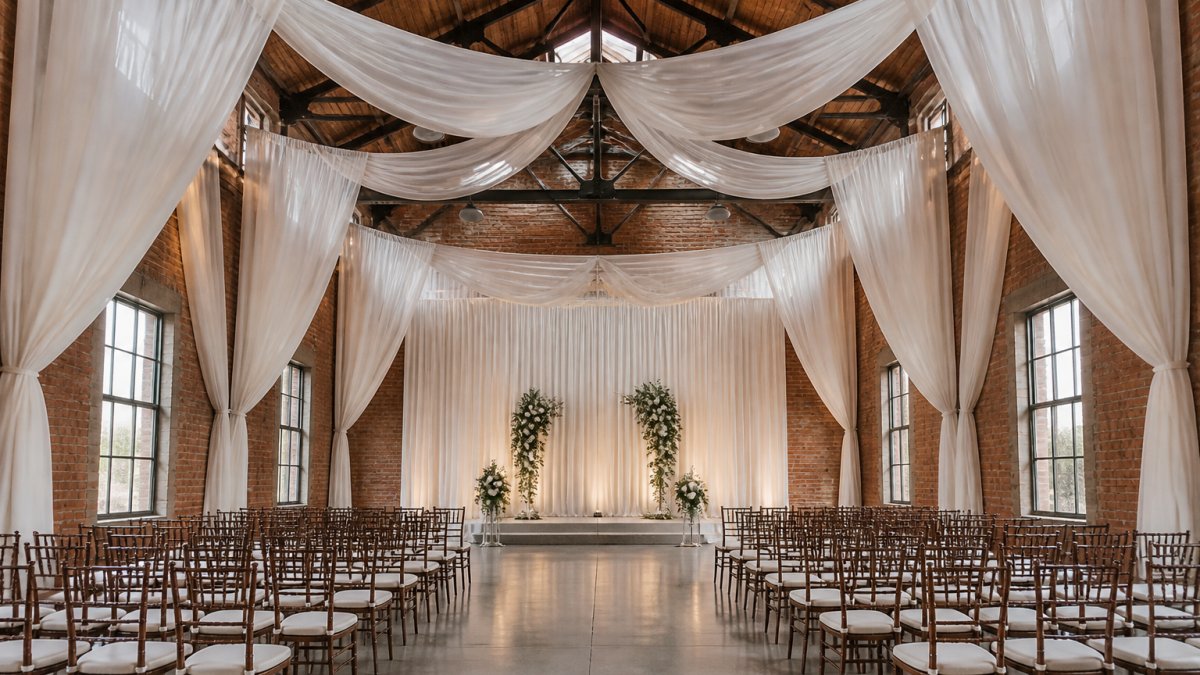
For ceremony backdrops, layer sheer fabric over velvet. The sheer layer catches light and creates ethereal quality while velvet provides color depth and visual weight.
Reception draping often uses lighter fabrics and elaborate pleating. Polyester blends in soft colors create romantic ambiance affordably. Ceiling draping with sheer fabric softens harsh overhead lighting.
Neutral tones like ivory, champagne, and soft gray work with any aesthetic. Jewel tones create dramatic elegance; pastels suit spring and summer celebrations.
Draping Techniques for Events
Different event types benefit from different draping approaches. Understanding these variations helps you choose the technique that best serves your specific event goals.
Vertical and Horizontal Techniques
Vertical draping creates height and draws the eye upward, making spaces feel larger and more dramatic. This technique works exceptionally well for trade show booths, where you want to maximize visual impact in a limited footprint. Vertical pleats emphasize the uprights and create a structured, professional appearance.
Horizontal draping creates width and a sense of flow. This technique works well for room dividers and ceiling treatments, where you want to emphasize space rather than height. Horizontal swags and waves create movement and visual interest without overwhelming the space.
Combination techniques use both vertical and horizontal elements. For example, vertical pleats on the main backdrop with horizontal swags at the top create visual complexity and sophistication. This approach requires more fabric and more careful planning but delivers exceptional visual results.
Double-Layer Draping and Ceiling Drape Fundamentals
Double-layer draping adds visual depth and allows you to combine contrasting colors or textures. The back layer is typically a solid, neutral color that provides visual weight. The front layer can be sheer, patterned, or a contrasting color that creates visual interest.
Ceiling drape transforms overhead spaces and softens harsh lighting. Fabric is attached to ceiling points and allowed to drape gracefully downward, creating a tent-like effect. Proper ceiling drape requires careful calculation of attachment points and fabric quantity, too little fabric looks sparse, while excessive fabric creates a cluttered appearance.
For ceiling drape, begin at the center of your space and work outward. Attach fabric to the center point first, then work toward the edges, creating even sags and consistent tension.
Safety and Weight Load Calculations
Professional draping installations must account for fabric weight and structural capacity. A common mistake is ignoring weight calculations, which can result in collapsed frames or damaged venues.
Fabric Care and Wrinkle Removal
Professional-looking draping requires fabric in pristine condition. Wrinkles compromise the visual impact and suggest poor quality or rushed installation. Proper care before and after events maintains fabric quality and extends usable life.
Frequently Asked Questions
What is the correct way to hang drapes on a pipe system?
Start by assembling your backdrop frame with uprights secured in base plates. Attach the crossbar at your desired height, then clip or pin fabric at regular intervals along the bar. Maintain consistent tension as you work across, using pinch pleating or swaging techniques to create professional folds. For a polished finish, space attachment points 12 to 18 inches apart and adjust fabric tension to eliminate wrinkles while preserving the intended drape shape.
How much fabric do I need for professional draping?
Calculate fabric needs by measuring your backdrop width and desired drop length, then multiply by 1.5 to 2.5 depending on your draping style. Pinch pleating requires approximately 1.5 times your frame width, while swaging and double-layer techniques need 2 to 2.5 times. Always add 10 to 15 percent extra for adjustments, hemming, and contingencies. For ceiling drapes, measure the span and add extra length to account for fabric manipulation and aesthetic swoops.
What fabric is best for wedding draping?
Velvet and sheer fabrics are popular choices for weddings due to their elegant appearance and light-manipulation properties. Crushed velvet adds texture and depth, while sheer fabrics create soft, romantic backdrops. Choose flame-retardant materials that meet venue safety requirements. Consider your venue lighting and color scheme, darker velvets photograph well in dimly lit spaces, while sheers work beautifully with natural light.
What tools and equipment do I need for a pipe and drape setup?
Essential equipment includes uprights, base plates, crossbars, clips or C-clamps, and fabric. You'll also need a level, measuring tape, and potentially a ladder or lift depending on ceiling height. For professional finishing, gather pushpins, gaffer tape, and fabric steamer or iron for wrinkle removal. If working with heights over 12 feet, ensure you have proper fall protection and consider professional installation to meet safety standards and load capacity requirements.