 how-to
How to Install Pipe and Drape Step by Step
Table of Contents
- What You'll Need Before You Start
- Step 1: Lay Out the Base Plates and Plan Your Footprint
- Step 2: Insert Uprights and Connect Crossbars
- How to Set Up a Pipe and Drape Stand for Different Room Shapes
- How to Hang Drapes on Pipe and Drape: Sleeving, Hooking, and Spacing
- Pipe and Drape Safety Tips: Load Limits, Wind, and Crowd Control
- Professional Pipe and Drape Installation: When to Call in the Experts
- Troubleshooting, Teardown, and Storage
- Frequently Asked Questions
Last Updated: October 18, 2026
What You'll Need Before You Start
Installing pipe and drape starts with the right parts and a clear plan. This guide from Event Drape Rental walks you through each stage, from base plates to the final drape panel.
Pipe and drape is a portable backdrop system of weighted base plates, vertical uprights, and horizontal crossbars holding fabric panels.
Before you touch a single base plate, gather these parts:
- Base plates (weighted, one per upright)
- Pins to lock uprights into the bases
- Uprights (vertical poles)
Check your count first: one base and one upright per vertical support, plus enough crossbar length to span the full width.
Step 1: Lay Out the Base Plates and Plan Your Footprint
The first real step is placing your base plates where the finished backdrop will stand. Measure the room and mark your footprint before you set anything down, most DIY setups go wrong by building first and measuring later. A five-minute planning pass prevents the two most common failures: bases spaced wider than the crossbars can span, and a backdrop a few inches short of the wall it was meant to cover.
Measure the span and calculate the parts
Work in this order so the numbers drive the parts list:
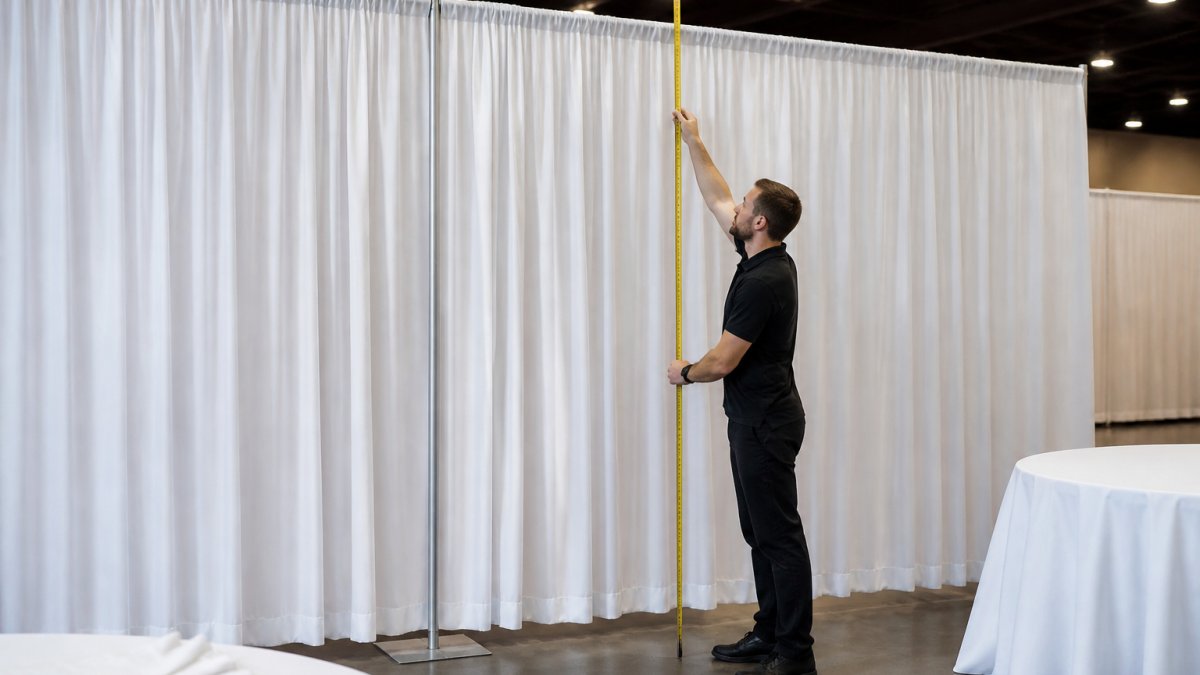
- Measure the finished width. Run your tape along the wall, opening, or booth line. Record the widest point, not the average, corners and door frames are where shortfalls show.
- Add overlap allowance. Add roughly 6 to 12 inches so end panels wrap or overlap the last upright and hide the frame edge. Skip this and the metal uprights show at both ends in photos.
- Divide by crossbar length. Standard crossbars come in fixed lengths, with telescoping bars covering gaps. Divide total width by bar length to get the number of bays. Round up, never down.
- Count uprights as bays plus one. Three bays need four uprights, one at each end and one between every pair of bays. Each upright needs its own base plate and pin.
- Count drape panels by fullness. A flat panel covers its own width; a gathered panel covers less. Plan on roughly 1.5 times the finished width in fabric so panels overlap and pool slightly. Divide total fabric width by panel width to get the panel count.
Write those four numbers down, total width, bay count, upright count, panel count, before you move a single base. That list is your shopping and staging checklist.
Mark the footprint on the floor
With the numbers settled, mark the floor:
- Snap or tape a line along the finished face of the backdrop.
- Mark each upright position at even intervals matching your bay length.
- Offset the base plates behind that line by the depth of the base, so uprights sit on the line and weights sit behind it.
- Leave clearance behind the backdrop for walking, cable runs, and weight, bases need room to sit flat and crew need room to work.
- Confirm the floor is level and clear of trip hazards along the whole base line.
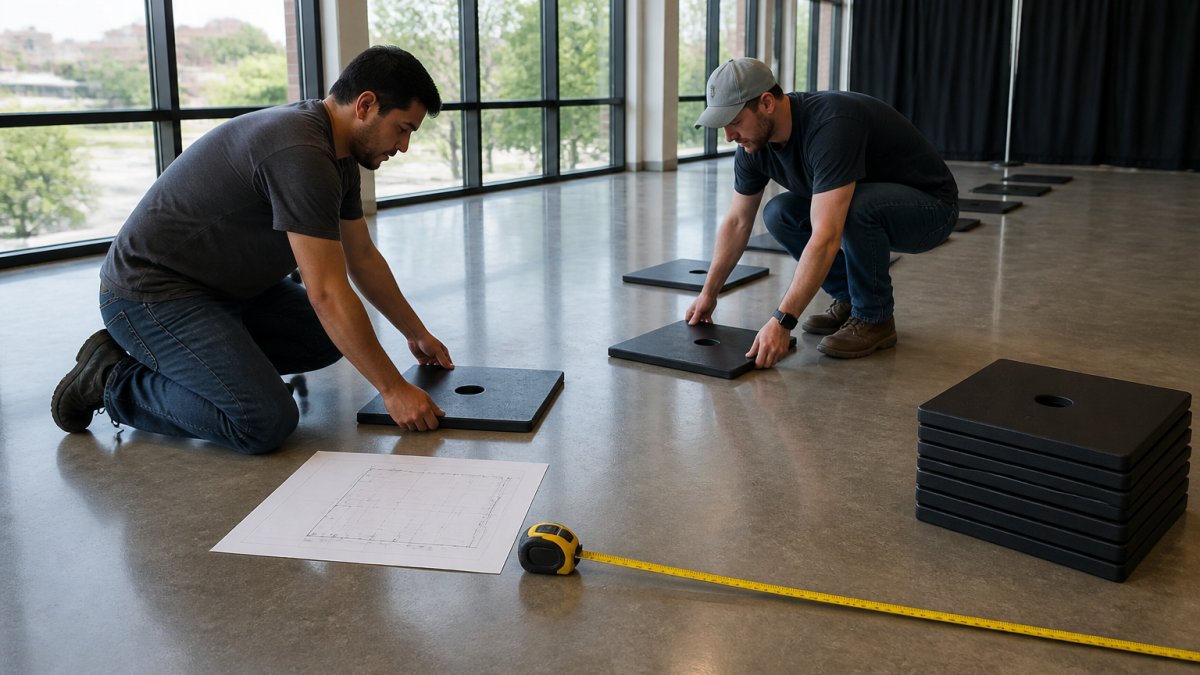
A common mistake is placing bases too far apart for the crossbars on hand. Match your base layout to your crossbar length, not the other way around.
Plan for the space, not just the wall
Clearance changes the layout as much as width does. A backdrop against a wall can sit close; a freestanding island or room divider needs base plates extending into open floor where people brush past. There, widen base spacing slightly for a broader footprint and keep the base line out of main traffic paths. If the backdrop sits near a door, vent, or loading dock, note it now, that is where wind and drafts will hit the fabric later.
Step 2: Insert Uprights and Connect Crossbars
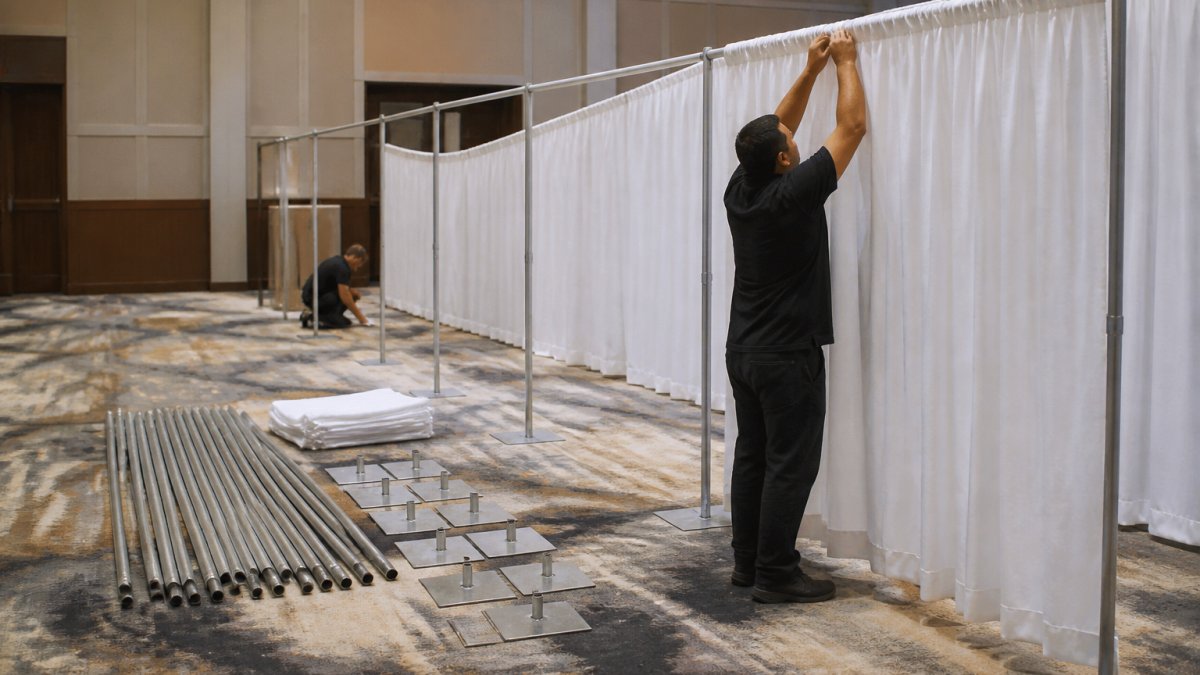
With bases positioned, assemble the frame: insert each upright into its base pin, then connect the crossbars across the tops. Work from one end to the other so the structure stays stable as it grows.
Follow this sequence:
- Seat the base pin firmly in each base plate.
- Insert the upright onto the pin and press down until it locks.
- Slide the crossbar into the upright's top connector.
- Extend the crossbar to your target width and lock it.
- Add a center support on long spans to stop sag.
- Check every connection with a firm tug before hanging fabric.
This is the core of how to set up a pipe and drape stand: bases, uprights, crossbars, in that order. Adjust upright height before you hang anything.
How to Set Up a Pipe and Drape Stand for Different Room Shapes
Room shape changes your layout, not your steps. A straight wall run, a corner, and a freestanding island use the same parts but different base placement.
Match the layout to the space:
- Straight run: bases in a single line along the wall or opening.
- L-shaped corner: one shared upright at the corner to save parts.
- Freestanding island: bases weighted and spaced to resist tipping.
For a corner, a shared upright at the bend keeps the frame rigid and uses fewer bases. For a freestanding island, wider base spacing gives a broader footprint in open floor areas where people brush past.
How to Hang Drapes on Pipe and Drape: Sleeving, Hooking, and Spacing
Hanging the drape decides whether the finished backdrop looks professional or homemade. There are two common methods: sleeving the fabric onto the crossbar, or hooking it on. Spacing and fullness matter as much as the method.
Sleeving means sliding the crossbar through a sewn pocket at the top of the panel. It gives a clean, even top line and is the standard for most rentals. Hooking uses hook-and-loop or hooks along the top edge and suits panels you need to swap quickly.
To hang drapes on pipe and drape:
- Lay the panel face-down and find the sleeve or hook edge.
- Slide the crossbar through the sleeve before raising it, or hook the panel along the bar.
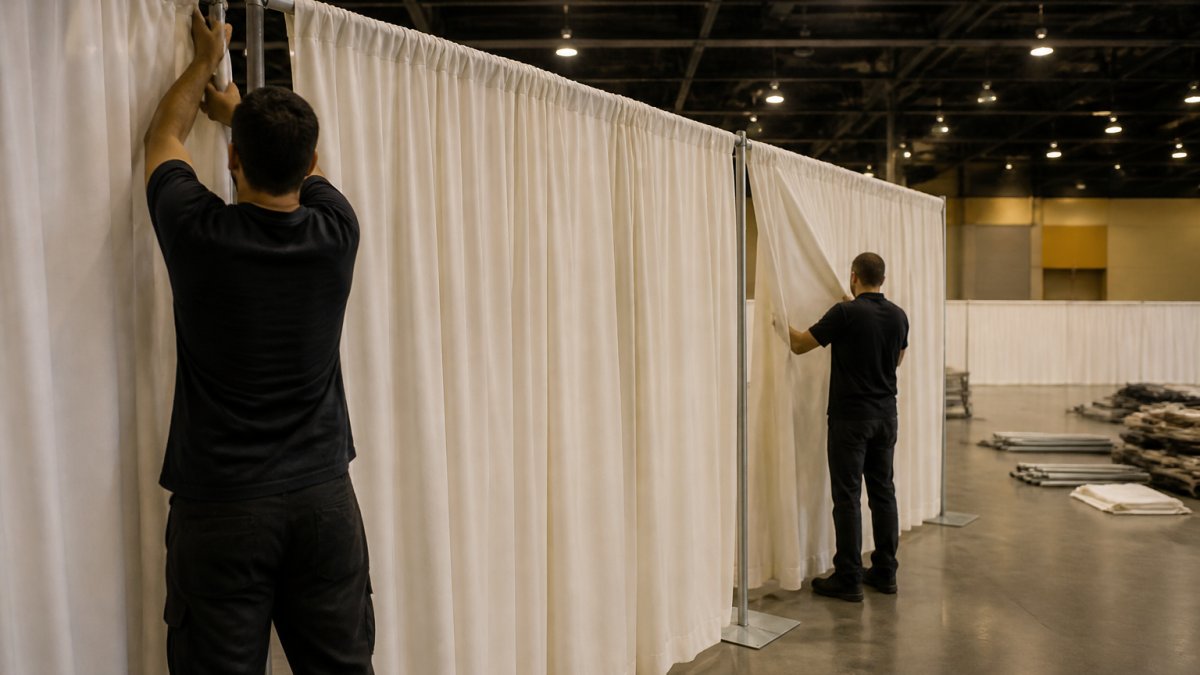
- Lift the bar into the upright connectors.
- Spread the fabric evenly for consistent fullness.
- Let the panel pool slightly at the floor for a high-end finish.
Check panel width against your span: too little fabric looks stretched, too much bunches at the bases.
Pipe and Drape Safety Tips: Load Limits, Wind, and Crowd Control
Safety is the part most setup guides skip, and it matters most. A pipe and drape frame is only as stable as its bases and layout.
Follow these pipe and drape safety tips:
- Respect load limits. Don't hang lights, signs, or heavy props on a frame rated only for fabric.
- Weight the bases and keep them flat on a level floor.
- Brace against wind outdoors or near open doors and vents.
Outdoor setups need extra care. Many venues require flame-retardant drapery, and the National Fire Protection Association publishes life-safety guidance that event planners should review before install.
For any public event, confirm requirements with your local fire marshal. Rules vary by venue and jurisdiction, and the U.S. Fire Administration offers general fire-safety resources for public gatherings.
Professional Pipe and Drape Installation: When to Call in the Experts
Some jobs are worth doing yourself. Others are worth handing off. Professional pipe and drape installation makes sense when height, scale, or stakes are high.
Call in the pros when:
- Drapes need to reach 12 to 30 feet or higher.
- The venue has a tight load-in window or rush timeline.
- You need flame-retardant, professional-grade fabric.
At Event Drape Rental, we offer both DIY and professional installation options, with drapes ranging from 12 to 30 feet tall and a large color and fabric selection to match brand guidelines. If you're weighing the trade-off, the U.S. Small Business Administration notes that outsourcing specialized tasks can protect tight event timelines.
Troubleshooting, Teardown, and Storage
Most setup problems have simple fixes tracing back to three causes: a mismatched part, an unlevel floor, or a span too long for the crossbar. Learn them before the event and you will avoid the panic of a wobbly frame minutes before doors open.
Troubleshooting common setup problems
Frame wobbles or leans. Re-seat every pin and check that each base plate sits flat.
Drape looks stretched or flat. The fabric is too narrow for the span.
Fabric slips or bunches on the bar. Sleeved panels slide along a smooth crossbar.
Uneven hem line at the floor. Adjust upright height before hanging fabric, not after.
Fabric drags or pools too much. Raise the uprights slightly or shorten the panel.
Teardown in reverse order
Teardown is setup in reverse, and doing it in order protects parts and people. Take fabric down first, then crossbars, then uprights, then bases.
As you go, sort parts by size rather than piling them together. Crossbars of different lengths look alike at the end of a long day, and mixing them is what makes the next install slow. Keep pins with their bases and uprights with their crossbars.
Storage that protects the kit
Fold panels loosely and store them flat or rolled on a tube to avoid hard creases. Wipe metal parts dry before storage so they do not corrode, especially after outdoor or damp events. Store bases stacked and poles bundled, and label bundles by length. A little care at teardown saves hours next time, and a labeled kit is the difference between a fast install and a hunt for the right bar.
Frequently Asked Questions
What parts do you need to install pipe and drape?
A standard pipe and drape kit includes base plates, uprights (vertical poles), crossbars (horizontal pipes), and drape panels. You will also need a rubber mallet for seating pins, a tape measure, and a level. Some setups use hook-end crossbars that drop into slots on the uprights, while others use fixed-height pipes. Check that your crossbar length matches your upright spacing and that your fabric has a sewn pocket or hook-and-loop attachment. Event Drape Rental offers complete kits and individual components so you can build the exact configuration your room requires.
How far apart should pipe and drape uprights be?
Most portable pipe and drape systems are designed for uprights spaced to support the crossbar length. Wider spacing reduces the number of bases you need but increases the load on each crossbar and can cause sagging. For a full, gathered look, ensure adequate fabric volume. Always check the load rating for your specific crossbar length.
How do you keep a pipe and drape backdrop stable?
Stability starts with the base plates. Use appropriate bases for tall uprights or high-traffic areas, and make sure every base sits flat on the floor with the pin fully seated. Add sandbags or weight plates on top of bases when the backdrop is freestanding or exposed to air currents from doors or HVAC vents. For tall drapes (12 to 30 feet), ensure the system is securely stable. Never rely on fabric tension alone to hold a tall pipe and drape system upright, and always follow the pipe and drape safety tips provided by your rental supplier.
Can one person set up pipe and drape?
One person can set up a small pipe and drape backdrop (up to about 10 feet wide and 8 feet tall) in 20 to 30 minutes, but taller or wider configurations are safer with two people. A second person helps steady the upright while you insert the crossbar and keeps the base from tipping during fabric installation. For 12-foot or taller drapes, professional pipe and drape installation is strongly recommended because the panels are heavy and the leverage at the top of the upright is significant. If you are working solo, assemble the frame completely before adding any fabric.