 how-to
How to Secure Pipe and Drape Systems
Table of Contents
- Understanding Your Pipe and Drape Components
- How to Secure Pipe and Drape with Proper Baseplate Setup
- Pipe and Drape Base Plate Weight Requirements
- Connecting Horizontal Crossbars and Attaching Drape Fabric
- How to Stabilize Pipe and Drape Outdoors
- Pipe and Drape Setup Safety Checklist
- Common Mistakes to Avoid When Securing Pipe and Drape
- Pro Tips for Professional-Grade Results
- Frequently Asked Questions
Last Updated: August 29, 2026
Understanding Your Pipe and Drape Components
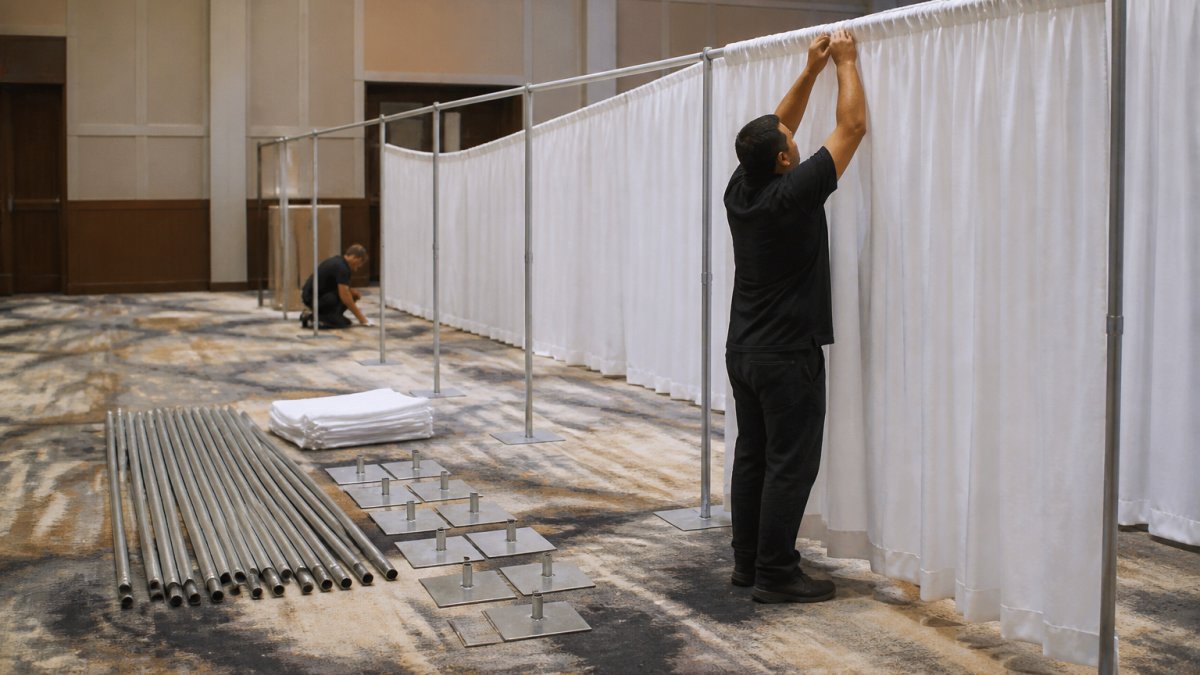
Pipe and drape consists of four essential elements: the baseplate (weighted foundation), uprights (vertical pipes), crossbars (horizontal supports), and fabric drape. The baseplate is a steel or aluminum plate with a socket for the upright pipe. The upright is a hollow vertical tube extending from the baseplate, usually 8 to 30 feet depending on your space. Crossbars connect two uprights horizontally and provide structure for hanging fabric. The drape hangs from the crossbar using clips, pockets, or ties.
A weak baseplate means an unstable upright. An improperly secured crossbar will sag under fabric weight. Loose fabric creates an unprofessional appearance and poses a safety risk. Event Drape Rental's inventory includes uprights ranging from 12 to 30 feet paired with baseplates engineered for stability. Knowing your component specifications before installation prevents costly mistakes and ensures your event looks polished.
How to Secure Pipe and Drape with Proper Baseplate Setup
Positioning the baseplate correctly
Your baseplate must sit on a completely level surface. Even a slight slope will cause the upright to lean, creating tension and instability. Use a level tool to check the floor before placing your baseplate.
Position the baseplate with its socket facing upward and ensure it sits flat with no rocking. On carpet, use a plywood sheet under the baseplate to distribute weight and prevent sinking. For outdoor events, place baseplates on level ground or use leveling shims to compensate for grade changes.
Baseplate spacing depends on your crossbar length and fabric weight. Typically, baseplates should be positioned 8 to 12 feet apart for standard crossbars. Closer spacing provides more stability but requires more equipment. Mark your baseplate positions using tape or chalk before installation to ensure consistent alignment.
Installing uprights and securing pins
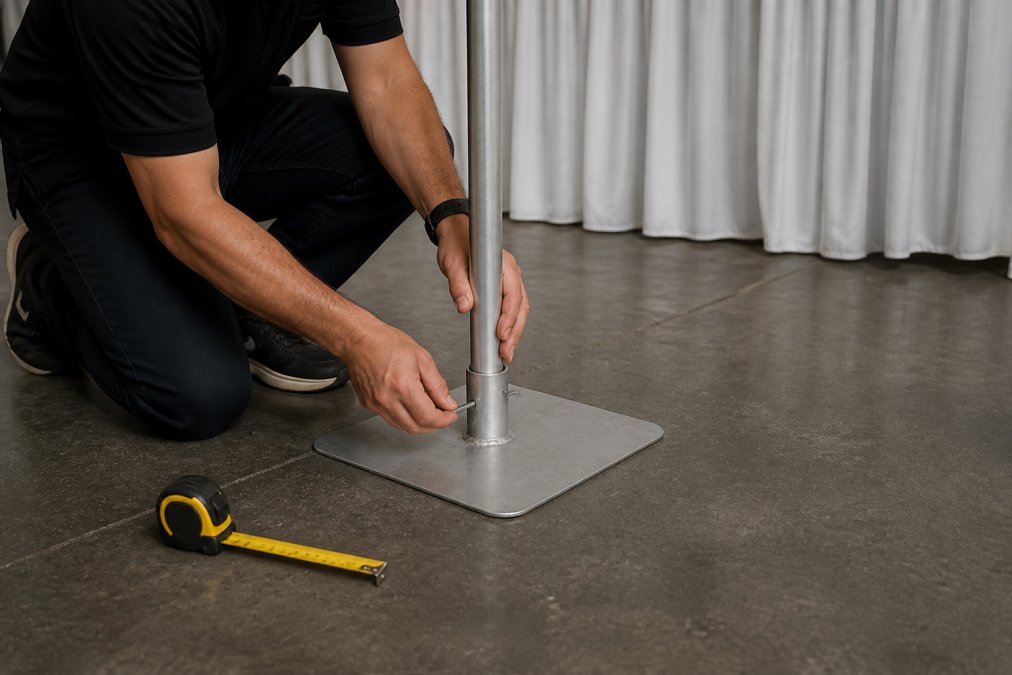
Insert the upright pipe into the baseplate socket. It should slide in smoothly without forcing. Secure it immediately with the locking pin, which passes through holes in the baseplate and upright, preventing the pipe from lifting out. This is a critical safety step.
Push the pin all the way through until it seats completely. You should hear or feel a slight click when properly locked. Some systems use cotter pins or safety clips as secondary locks, use them. Never rely on gravity alone to keep the upright in place.
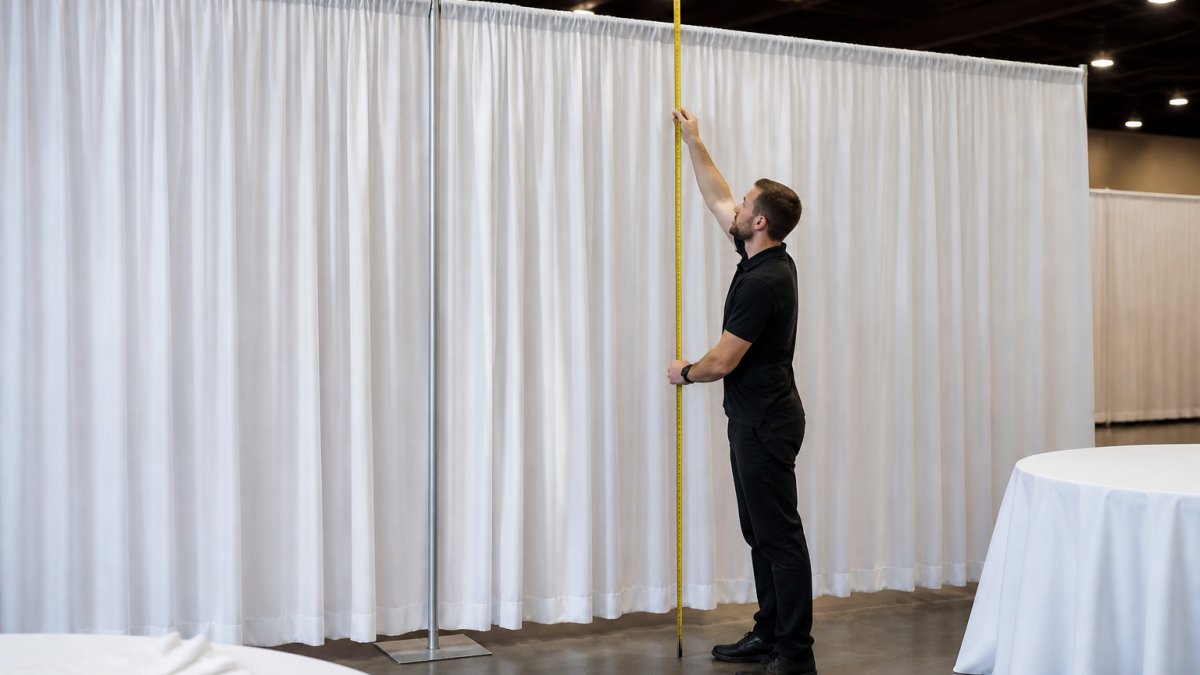
Check the upright for vertical alignment using a level. It should be perfectly plumb (straight up and down). Even 1 or 2 degrees of lean will become obvious once you add fabric. If the upright leans, the baseplate is not level; return to that step and correct it.
Pipe and Drape Base Plate Weight Requirements
Standard baseplates typically weigh between 35 and 50 pounds, though heavier-duty models can exceed 80 pounds. Baseplate weight directly correlates to its ability to keep the upright stable under the load of fabric and crossbars.
A single panel of drape 10 feet wide by 20 feet tall can weigh 40 to 60 pounds depending on fabric material (peer-reviewed research). Event Drape Rental offers fabric materials ranging from lightweight voile to heavy velour, each with different weight characteristics affecting baseplate requirements.
For indoor events on solid flooring, a 35 to 50-pound baseplate handles most standard configurations. For outdoor events or high wind conditions, use heavier baseplates in the 60 to 80-pound range, plus sandbags (typically 25 to 40 pounds each) placed on the baseplate feet.
Calculate your total load by adding the weight of the upright, crossbar, and drape. Never exceed a baseplate's weight rating, as this creates a tipping hazard that can damage equipment and injure people.
Connecting Horizontal Crossbars and Attaching Drape Fabric
Securing crossbars to uprights
Crossbars connect two uprights and provide horizontal support for your drape. They slide into sockets at the top of each upright or at specific height points. Like the baseplate-to-upright connection, crossbars must be secured with pins.
Slide the crossbar into both upright sockets simultaneously if possible. The crossbar should sit flush in both sockets with no gaps. Once seated, insert the locking pins through the upright sockets and the crossbar at both ends. A crossbar with only one pin secured will rotate under fabric weight, creating an unsafe appearance.
Check that the crossbar is level using a level tool. A sagging crossbar will cause fabric to drape unevenly. If the crossbar sags, your uprights are leaning or your baseplate is not level; correct those issues.
Attaching drapes without sagging or shifting
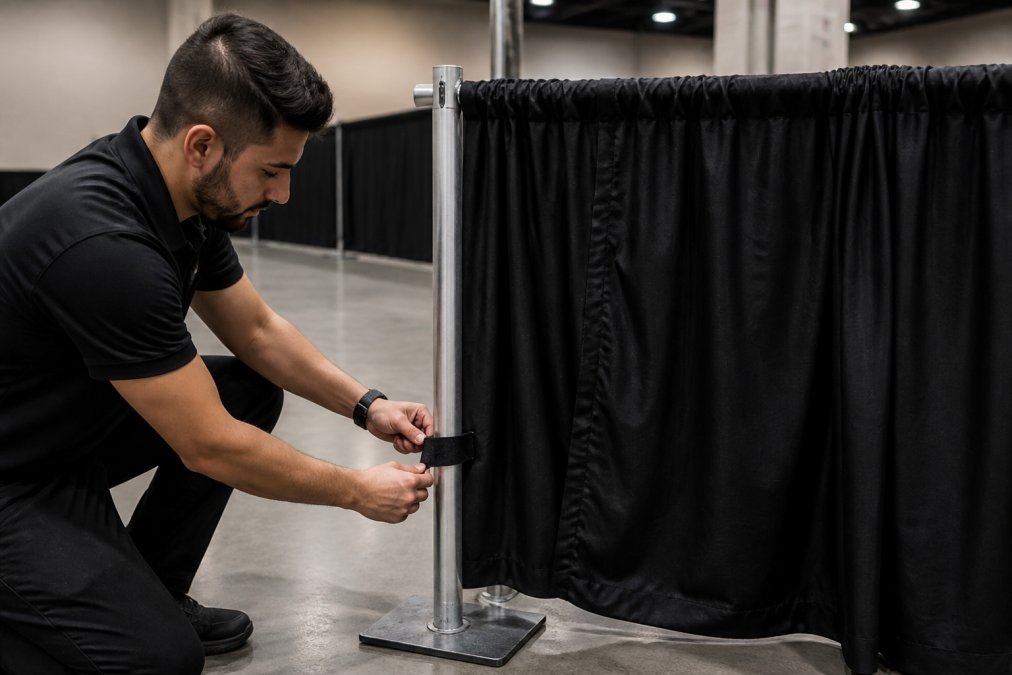
Drape attachment methods include fabric pockets (where the crossbar slides through a sewn pocket), clip systems (where clips grip the crossbar), and tie systems (where fabric ties secure to the crossbar).
For pocket systems, slide the crossbar through the pocket smoothly and evenly, distributing fabric weight along the entire length. For clip systems, space clips evenly along the crossbar, typically every 12 to 18 inches depending on fabric weight. Tighten each clip firmly so the fabric doesn't slip. For tie systems, tie the fabric securely using square knots or bow knots that won't slip, distributing ties evenly.
After attaching the drape, step back and visually inspect the line. The fabric should hang straight and even with no bunching or sagging. If you see sagging, check your clips or ties for looseness and tighten as needed.
How to Stabilize Pipe and Drape Outdoors
Anchoring on uneven ground
Outdoor installations face challenges that indoor setups don't: wind, uneven ground, and the need for additional anchoring. A baseplate that rocks on uneven terrain will never be stable.
Use leveling shims, plastic or rubber wedges, under the baseplate feet to compensate for grade changes. Place shims under the low corners until the baseplate sits flat and doesn't rock. For severe grade changes, consider using adjustable feet or a leveling base designed for outdoor use.
Once the baseplate is level, it's still susceptible to tipping in wind. Additional anchoring is essential. Never rely on baseplate weight alone for outdoor stability.
Using guy wires and sandbags for wind resistance
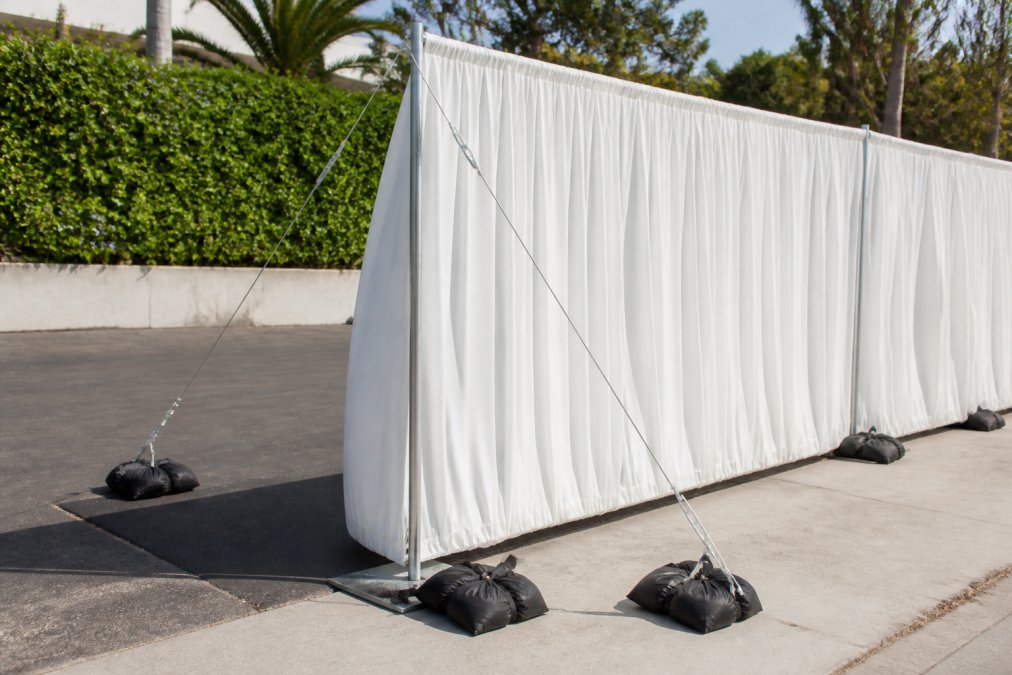
Guy wires are cables or ropes attached to the upright and anchored to the ground at an angle. They provide lateral support and prevent the upright from tipping in wind.
Attach guy wires to the upright at a height approximately two-thirds up the pipe. The angle between the guy wire and the ground should be approximately 45 degrees for optimal stability. Anchor guy wires to the ground using stakes, weighted sandbags, or permanent anchors. Use at least two guy wires per upright for balanced support.
Tension the guy wire firmly but not excessively. The wire should be taut with no slack. Sandbags placed directly under the baseplate feet also increase stability. Position sandbags at each baseplate foot. For a standard outdoor setup, plan on 25 to 40 pounds of sandbag weight per baseplate.
Light wind (under 15 mph) requires minimal additional anchoring beyond baseplate weight (osha.gov). Moderate wind (15 to 25 mph) requires sandbags and possibly guy wires. Strong wind (over 25 mph) requires full guy wire systems with multiple anchor points per upright.
Pipe and Drape Setup Safety Checklist
Before your event begins, verify every element of your setup:
- All baseplates sit level on the floor or ground with no rocking
- All uprights are secured to baseplates with locking pins fully inserted
- All uprights are plumb (vertical) when checked with a level
- All crossbars are seated fully in upright sockets and secured with pins
- All crossbars are level with no sagging
- All drape is attached evenly with no bunching or loose sections
- For outdoor setups: all guy wires are tensioned and properly anchored
- For outdoor setups: all sandbags are positioned and weighted correctly
- No uprights show signs of bending or damage
- No baseplates show cracks or damage
- All locking pins are in place and secured
- The entire structure is stable when gently pushed from multiple directions
This checklist takes 10 to 15 minutes but prevents costly mistakes and safety issues.
Common Mistakes to Avoid When Securing Pipe and Drape
The most frequent mistake is skipping the level-checking step. A baseplate that appears level to the eye may actually be off by 1 or 2 degrees. Use a level tool every time.
Another common error is under-securing components. Locking pins that aren't fully inserted, crossbars that aren't pinned at both ends, and drape that's loosely clipped all contribute to instability. Each connection point must be fully secured.
Overloading a single baseplate is another frequent problem. Distribute load evenly across multiple baseplates and uprights rather than stacking multiple crossbars on one upright.
For outdoor setups, failing to account for wind is critical. Always use guy wires and sandbags for outdoor installations, regardless of current weather.
Spacing baseplates too far apart causes sagging crossbars and unstable uprights. Standard practice is spacing baseplates 8 to 12 feet apart for reliable stability.
Not inspecting equipment before installation is another mistake. Bent uprights, cracked baseplates, and damaged pins should be identified and replaced before setup begins.
Pro Tips for Professional-Grade Results
Use a laser level for large installations to verify that multiple baseplates are at the same height across a long run of drape. This prevents subtle sagging that catches the eye.
Plan your layout on paper before installation. Sketch the baseplate positions, upright heights, and crossbar placements to prevent repositioning mid-setup.
Invest in quality locking pins and ensure they're always in place. Quality pins prevent wobble and problems that waste time during setup.
For fabric attachment, spend extra time on even distribution. Uneven tension creates visible waves in the drape that undermine professional appearance.
Consider sight lines from the audience perspective. Walk to where guests will view the drape and check for sagging, bunching, or misalignment.
Use Event Drape Rental's professional installation service for high-profile events. The team brings specialized equipment, experience with complex layouts, and the ability to handle rush timelines.
Test your setup before guests arrive. Run through the entire installation, check every connection point, and verify stability.
For outdoor events, check weather forecasts before finalizing your anchoring plan. Adjust your guy wire tension and sandbag placement based on actual conditions.
Securing pipe and drape systems correctly transforms your venue from ordinary to exceptional. The process requires attention to detail, proper technique, and respect for the structural principles that keep everything stable. Whether you're managing a corporate event, trade show, or wedding, these steps ensure your drape looks professional and stays secure throughout the event. For complex installations or high-stakes events, Event Drape Rental's professional installation service brings expertise and specialized equipment that guarantees flawless results. Request a quote today to discuss your event's specific needs and learn how professional installation can elevate your venue's appearance.
| Component | Key Requirement | Consequence of Failure |
|---|---|---|
| Baseplate | Must sit level and flat | Upright leans, entire structure becomes unstable |
| Locking pins | Must be fully inserted at every connection | Uprights or crossbars can lift or rotate |
| Crossbars | Must be level and pinned at both ends | Fabric sags and creates unprofessional appearance |
| Drape attachment | Must be evenly distributed and tight | Fabric bunches, shifts, or sags visibly |
| Guy wires (outdoor) | Must be tensioned at 45-degree angle | Uprights tip in wind, creating safety hazard |
| Sandbags (outdoor) | Must be positioned at baseplate feet | Insufficient wind resistance, tipping risk |
Event Drape Rental specializes in helping event professionals create stunning venues with reliable pipe and drape systems. Our 12 to 30-foot drape options, combined with professional-grade baseplates and uprights, provide the foundation for secure installations. Whether you choose DIY setup using our rental equipment or opt for professional installation, we ensure your event space transforms beautifully. With over 300 colors and 6 different fabric materials available, you'll find the perfect aesthetic for your vision. OSHA guidelines on temporary structures and event safety recommend professional assessment for large-scale installations. Contact Event Drape Rental to request a quote and discuss whether professional installation or equipment rental best serves your event.
Frequently Asked Questions
What weight base plate is needed for 12-foot drapes?
A 12-foot drape setup typically requires a baseplate of a certain weight per upright on level indoor floors. Outdoor installations or taller configurations (15-30 feet) demand heavier baseplates, plus sandbags. Always verify the specific weight capacity of your baseplate model and multiply by the number of uprights in your configuration. Heavier drape fabrics and crossbar loads increase these requirements significantly.
How do you prevent pipe and drape from tipping over?
Prevent tipping by using appropriately weighted baseplates, ensuring level floor positioning, and anchoring uprights with guy wires or cross-bracing. Outdoor setups require sandbags at each baseplate corner. Check that all pins are fully inserted into spigots before loading drapes, distribute fabric weight evenly across crossbars, and avoid hanging heavy objects on one side. For events with wind exposure, calculate wind load requirements and use additional tie-back straps to secure drapes to fixed structures when possible.
Is it necessary to use sandbags with pipe and drape?
Sandbags are essential for outdoor pipe and drape installations, especially in areas with wind exposure. Indoors on level floors, sandbags may not be required if baseplates are sufficiently weighted and the space is climate-controlled. However, using sandbags dramatically improves stability for any outdoor event and provides insurance against unexpected air movement. Trade shows and temporary installations benefit from sandbags even indoors if foot traffic or vibration from equipment is present.
How do you attach drapes to the crossbar securely?
Attach drapes using fabric pockets sewn into the top edge that slide over the crossbar, or use clamps and tie-back straps spaced every 12-18 inches along the bar. Ensure the crossbar is level before hanging drapes. Distribute fabric weight evenly by using multiple attachment points and avoid bunching fabric on one side. Secure tie-backs to prevent swaying, especially in areas with air conditioning or foot traffic. Test the installation by gently pulling on the fabric, it should not shift or sag under its own weight.
This article was written using GrandRanker