 ultimate-guide
Pipe and Drape for Tall Ceilings: Setup Guide
Table of Contents
- Why Pipe and Drape for Tall Ceilings Requires Different Planning
- Understanding Adjustable Height Uprights and Telescoping Pipe Systems
- Heavy Duty Pipe and Drape Base Plates: Stability Foundation for Height
- How to Calculate Drape Fullness for Tall Ceilings
- Safety Standards for Event Drapery at Height
- Ceiling Clearance Planning and Obstruction Assessment
- Step-by-Step Setup Instructions for Tall Installations
- Drape Fabric Types and Weight Distribution for Tall Heights
- Frequently Asked Questions
Last Updated: August 20, 2026
Why Pipe and Drape for Tall Ceilings Requires Different Planning
Standard pipe and drape approaches fail at tall ceilings. The physics changes, stability requirements multiply, and visual impact shifts dramatically. Most event professionals discover this the hard way: underestimated engineering complexity, improper drape hang, or safety liabilities. Planning matters more at height than anywhere else.
This guide covers the technical and practical dimensions of installing pipe and drape for tall ceilings: structural foundations, fabric considerations, safety protocols, and step-by-step setup.
Understanding Adjustable Height Uprights and Telescoping Pipe Systems
The backbone of any tall pipe and drape installation is the vertical pole system. Telescoping uprights work through a slip collar mechanism where each section of pipe slides into the next, allowing extension while maintaining stability. The slip collar locks sections in place, preventing collapse under drape weight and crossbar load.
Professional-grade telescoping systems typically extend in 2-foot or 3-foot increments. A system rated to 20 feet might consist of five sections that nest when collapsed, then extend fully when locked. At 18 feet in the air, the difference between cheap systems with loose collars and professional-grade systems with tight collars and redundant locking points is the difference between stability and potential failure.
Most professional systems use 1.5-inch or 2-inch diameter steel tubing with wall thickness of 0.065 inches or greater. Larger diameter distributes load more effectively and resists bending from the lateral load created by drape weight pulling perpendicular to the pole.
Heavy Duty Pipe and Drape Base Plates: Stability Foundation for Height
The base plate is where everything connects to the floor, and where most installations fail at height. A lightweight base plate designed for 10-foot installations becomes inadequate at 20 feet. The tipping moment increases exponentially.
Heavy-duty base plates resist tipping by distributing weight load across a wider footprint. A standard base plate might be 12 inches by 12 inches; a heavy-duty base plate for tall installations can be 18 inches by 18 inches or larger. A 15-pound base plate provides minimal ballast; a heavy-duty base plate weighing 25 to 40 pounds acts as a counterweight to the tipping force created by drape fabric pulling on the tall pole.
A general rule: base plate weight should be at least 5 to 10 percent of the total load the system supports (upright, crossbar, and drape fabric combined). For a 20-foot installation supporting 150 pounds of fabric and hardware, you'd want a base plate in the 30 to 50-pound range. The floor surface matters too, polished concrete reduces friction, increasing tipping risk, while carpeted floors provide more friction. Many professional installations use base plate feet with rubber pads to increase friction without creating trip hazards.
How to Calculate Drape Fullness for Tall Ceilings
Drape fullness describes how much fabric you use relative to the width you're covering. A 1:1 fullness means fabric width equals coverage width, hanging flat and straight. A 1.5:1 fullness means 50 percent more fabric, creating visible folds and a luxurious appearance.
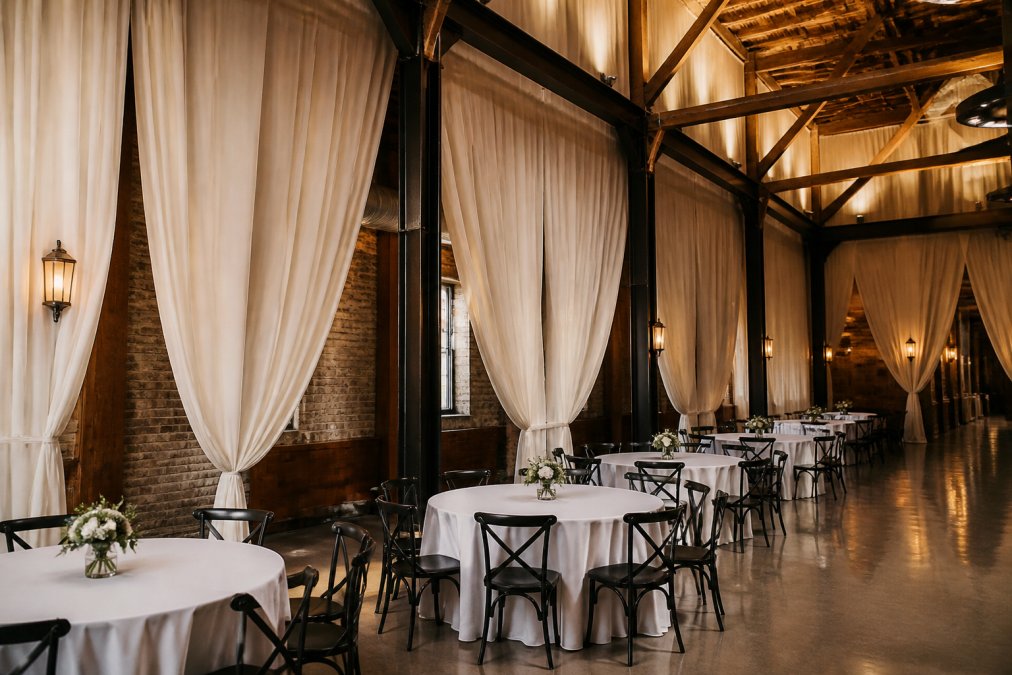
For tall ceilings, fullness calculations become critical because visual impact changes with height. A drape that looks well-proportioned at 10 feet can look skimpy at 25 feet. Most professionals recommend 1.5:1 to 2:1 fullness for tall ceiling installations. A 1:1 ratio looks thin and stretched; a 2:1 ratio creates dramatic, voluminous drapes that fill vertical space.
The calculation is straightforward: multiply coverage width by desired fullness ratio to get fabric width needed. If covering 10 feet of width with 1.5:1 fullness, you need 15 feet of fabric width. Fabric weight per linear foot varies by material: poly premier weighs around 4 to 5 ounces per linear yard; velour weighs 8 to 10 ounces per linear yard. A 20-foot tall installation with 15 feet of velour fabric at 2:1 fullness means hanging roughly 60 linear feet of fabric per panel, approximately 20 pounds per panel. Know your fabric weight before designing the installation, as light fabrics allow higher fullness ratios without overloading the system.
Safety Standards for Event Drapery at Height
Event drapery safety is governed by building codes and industry standards that become mandatory when installing drapes at height. NFPA 101, the Life Safety Code, covers fabric flame resistance in public assembly spaces. Most event venues require flame-retardant drapes meeting specific burn rate standards.
Tall installations must comply with local building codes governing temporary structures. Many jurisdictions require installations over a certain height (often 10 to 15 feet) to meet structural engineering standards and may require a licensed engineer to stamp the design.
Every connection point, base plate to floor, upright to base, crossbar to upright, fabric to crossbar, must be secure and rated for its load. Wind load is critical for outdoor tall installations or installations near large openings. A 20-foot tall drape panel in a 15-mile-per-hour wind experiences significant lateral force. Professional installations include safety checks: verifying base plates are seated firmly, all locking pins are engaged, crossbars are level, and drape panels are evenly distributed.
Ceiling Clearance Planning and Obstruction Assessment
Before committing to a tall pipe and drape installation, know exactly what's above the drape. Measure the vertical distance from floor to actual ceiling using a measuring tape or laser measure at multiple points; ceilings aren't always level.
Identify obstructions: sprinkler heads, light fixtures, HVAC returns, exposed beams, catwalks, or anything else between your planned drape height and ceiling. Building codes typically require 18 inches of clearance below sprinkler heads. Exit signage and emergency egress routes are non-negotiable, building codes require exit signs remain visible and emergency exit routes remain unobstructed.
Walk the venue with a measuring tape and floor plan. Mark ceiling height at your planned upright locations and all obstructions. Sketch the drape layout on the floor plan and verify nothing conflicts. This 30-minute exercise prevents hours of rework on-site.
Step-by-Step Setup Instructions for Tall Installations
Assessing Your Venue and Measuring Vertical Space
Walk the venue and document the floor condition. Is it polished concrete, tile, carpet, or something else? Polished concrete is slippery and reduces friction, increasing tipping risk. Uneven floors create stability problems; a base plate that rocks won't stay secure.
Measure ceiling height at multiple points using a laser measure or long measuring tape at each planned upright location. Identify the exact location of each planned upright and mark it on the floor with tape. Check for HVAC vents, sprinkler heads, light fixtures, and other ceiling elements within 18 inches above your planned drape height. Assess the floor's load-bearing capacity by asking the venue manager about weight restrictions.
Positioning Base Plates and Installing Vertical Poles
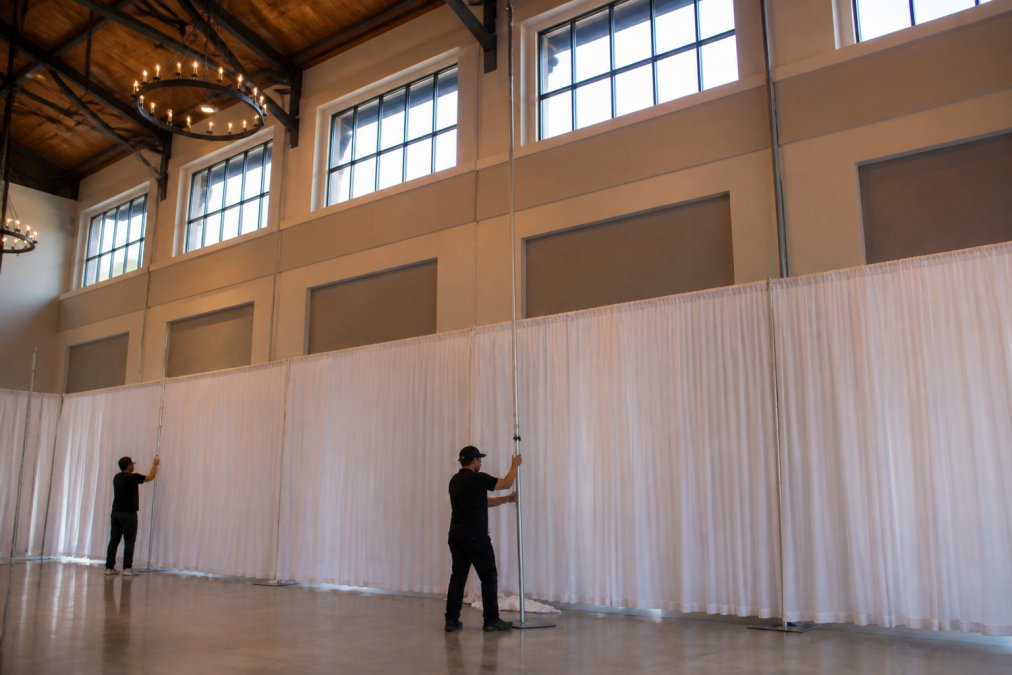
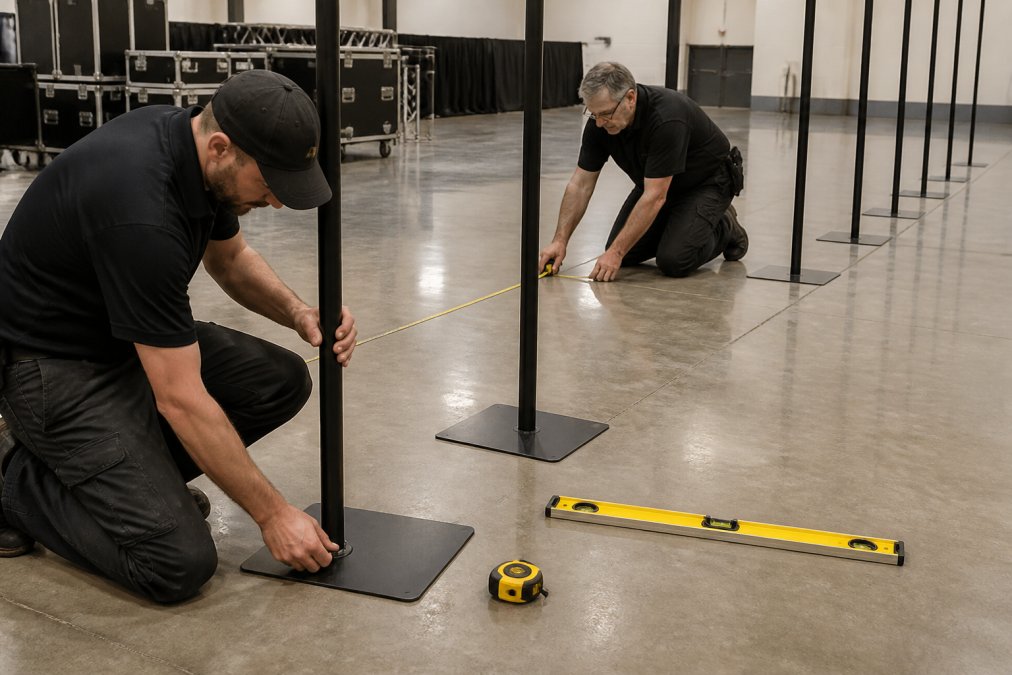
Lay out all base plates first and position each at its marked location. Check that each base plate sits flat on the floor. If the floor is uneven, use shims to level the base plate. Insert the bottom section of the upright into the base plate collar and align it vertically using a level. Tighten the bolts connecting upright to base plate.
Begin extending the upright by sliding the next section into the collar. Align it vertically as you extend and insert the locking pin through the collar to secure the section. Continue extending section by section, locking each one. As you extend the upright, check vertical alignment frequently with a level. Once the upright reaches your target height, verify that all locking pins are engaged and tight. Give the upright a gentle side-to-side push; it should feel solid, not wobbly.
Attaching Crossbars and Securing Horizontal Support
Position the crossbar collar on the upright at your target height. For tall installations, the crossbar typically hangs 12 to 18 inches below the ceiling. Attach the crossbar collar to the upright using the bolts provided and tighten securely. Slide the crossbar through the collars on both uprights and ensure it is level using a level tool.
For tall installations, consider adding a center support if the crossbar spans more than 15 feet. A center support, an additional upright positioned midway between outer uprights, prevents the crossbar from sagging under drape fabric weight. Tighten all bolts and collars and verify that the crossbar doesn't move side to side or up and down.
Hanging and Arranging Drape Panels
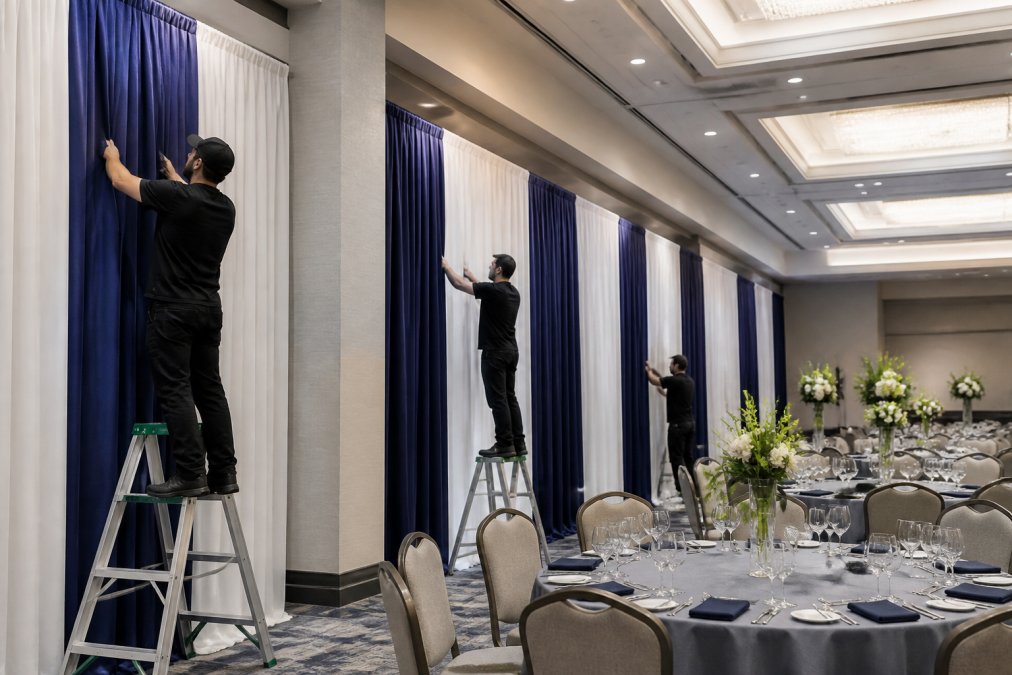
Inspect each drape panel before hanging for wrinkles, damage, or stains. Attach the first drape panel to the crossbar using drape clips or hooks, starting at one end and working toward the other. Distribute the panel evenly across the crossbar.
As you hang each panel, step back and assess the drape. Does it hang straight? Are the folds even? Is the fullness appropriate for the height? Ensure drape panels overlap slightly at seams to prevent gaps, a 2 to 3-inch overlap is standard. Once all panels are hung, step back and assess overall appearance. The drape should look balanced with even folds and consistent color.
Drape Fabric Types and Weight Distribution for Tall Heights
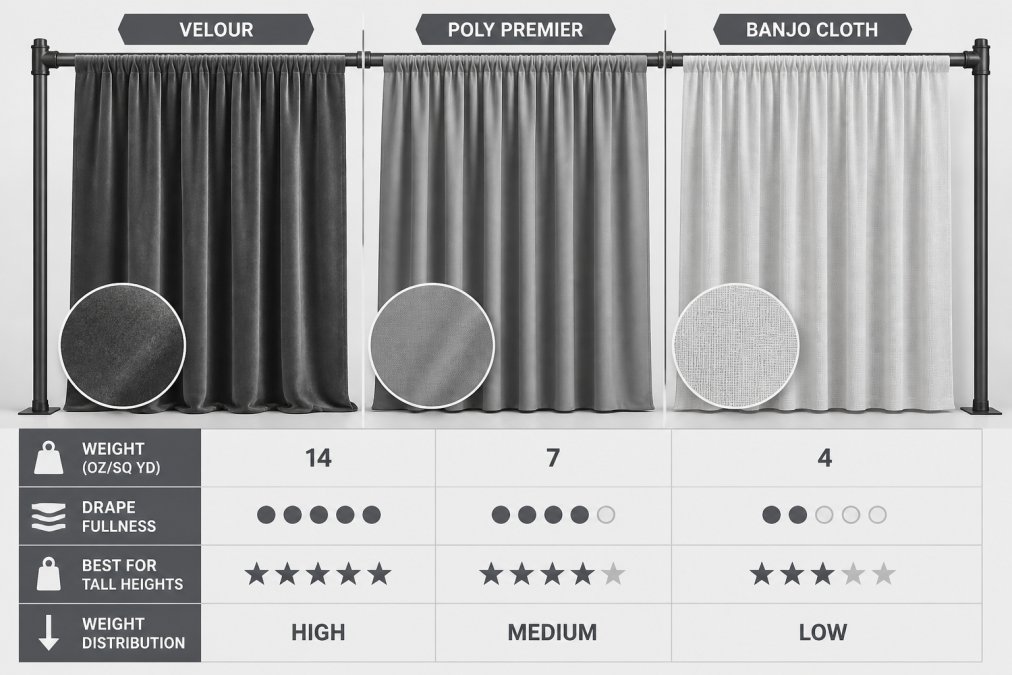
Poly Premier is a lightweight polyester blend weighing approximately 4 to 5 ounces per linear yard. It's affordable and comes in many colors but doesn't drape as luxuriously as heavier fabrics. Poly premier works well for tall installations when you use higher fullness ratios (1.5:1 or 2:1).
Velour is a dense, plush fabric weighing 8 to 10 ounces per linear yard. It drapes beautifully with rich, deep folds and looks luxurious. The downside is weight, at tall heights, velour requires stronger uprights and base plates. A 1.25:1 ratio with velour often looks as full as a 1.5:1 ratio with poly premier.
Banjo Cloth is a medium-weight option weighing 6 to 7 ounces per linear yard. For many tall installations, banjo cloth is the practical choice: it looks professional without overloading the structural system.
Weight distribution becomes critical at height. Use more uprights for tall installations with heavy fabric. Instead of spacing uprights 12 feet apart, space them 8 feet apart. This reduces load on each upright and base plate, improving stability. Consider the venue's lighting when selecting fabric, a dark fabric like navy velour can look almost black in dim lighting, while a light fabric like white poly premier can look washed out under bright stage lights.
When planning a tall pipe and drape installation, success comes down to understanding engineering fundamentals: structural load distribution, ceiling clearance, fabric weight, and stability requirements.
Event Drape Rental's inventory includes heavy-duty uprights and base plates designed specifically for tall installations, along with a range of fabric options from lightweight poly premier to luxurious velour. We offer both DIY rental options for teams handling setup themselves and professional installation services for events needing experienced crews. Request a quote to discuss your specific venue requirements and get pricing for your installation.
Frequently Asked Questions
How tall can pipe and drape systems actually go?
Professional-grade pipe and drape systems can reach 30 feet or higher when properly engineered with adjustable height uprights, telescoping pipe systems, and heavy-duty base plates. Heights beyond 30 feet require structural engineering calculations and additional safety measures. Ceiling height varies by venue, converted warehouses may reach 40+ feet. Contact us for custom solutions matching your specific venue clearance and requirements.
What safety standards apply to tall event drapery installations?
Event drapery must comply with NFPA 101 Life Safety Code and local fire codes requiring flame-retardant fabrics. Installations over 15 feet need stability calculations for weight distribution, secure base plate anchoring, and proper horizontal support spacing. Professional installation is recommended for heights exceeding 20 feet. Verify your venue's specific requirements and work with experienced installers who understand load-bearing limits and fall prevention.
How do I calculate drape fullness for tall ceilings?
Drape fullness depends on ceiling height, desired aesthetic, and fabric type. Standard fullness ranges from 1.5x to 2.5x the width you're covering, taller installations often use 2x fullness for better visual proportion. Measure your total vertical space, account for overlap at base plates, and factor in fabric weight. Heavier fabrics (velour) need less fullness than lighter options (poly premier). Request a quote with your venue dimensions for precise calculations.
Is professional installation necessary for tall pipe and drape?
DIY installation is possible for heights up to 12-15 feet with proper planning. Heights exceeding 15 feet benefit significantly from professional installation due to safety complexity, stability requirements, and time constraints. Professionals understand weight distribution, ceiling obstructions, and proper anchoring of base plates. They also handle rush timelines and multi-location deliveries. Professional installation ensures your event looks polished and meets safety standards.
This article was written using GrandRanker