 how-to
Pipe and Drape Installation Guide for DIY Events
Table of Contents
- Understanding Pipe and Drape Systems for Event Spaces
- What You'll Need Before Installation
- Pipe and Drape Installation Guide: Step-by-Step Setup
- How to Hang Ceiling Drapes Without Damaging Ceiling
- Professional Drape Installation Services vs. DIY
- Common Installation Mistakes to Avoid
- Customization Options for Backdrops and Room Dividers
- Frequently Asked Questions
Last Updated: September 27, 2026
Understanding Pipe and Drape Systems for Event Spaces
Pipe and drape installation is the practice of assembling modular metal frames and hanging fabric to create customizable backdrops, room dividers, and ceiling treatments for events. This system uses lightweight uprights, crossbars, and base plates that connect together to form a rigid structure, then fabric drapes over or behind the framework to transform a space.
Pipe and drape adapts to any vision: dividing warehouses into intimate sections, creating branded backdrops, or softening industrial ceilings. Event Drape Rental helps individuals and corporate planners achieve professional results with DIY or full professional installation.
Unlike permanent construction, pipe and drape divides space temporarily without damaging walls or ceilings, giving you complete control over layout, color, and aesthetic.
What You'll Need Before Installation
A typical pipe and drape system includes base plates (weighted feet), uprights (vertical poles, 8-12 feet tall), crossbars (horizontal connectors), fabric drapes, safety cables, and adjustable feet.
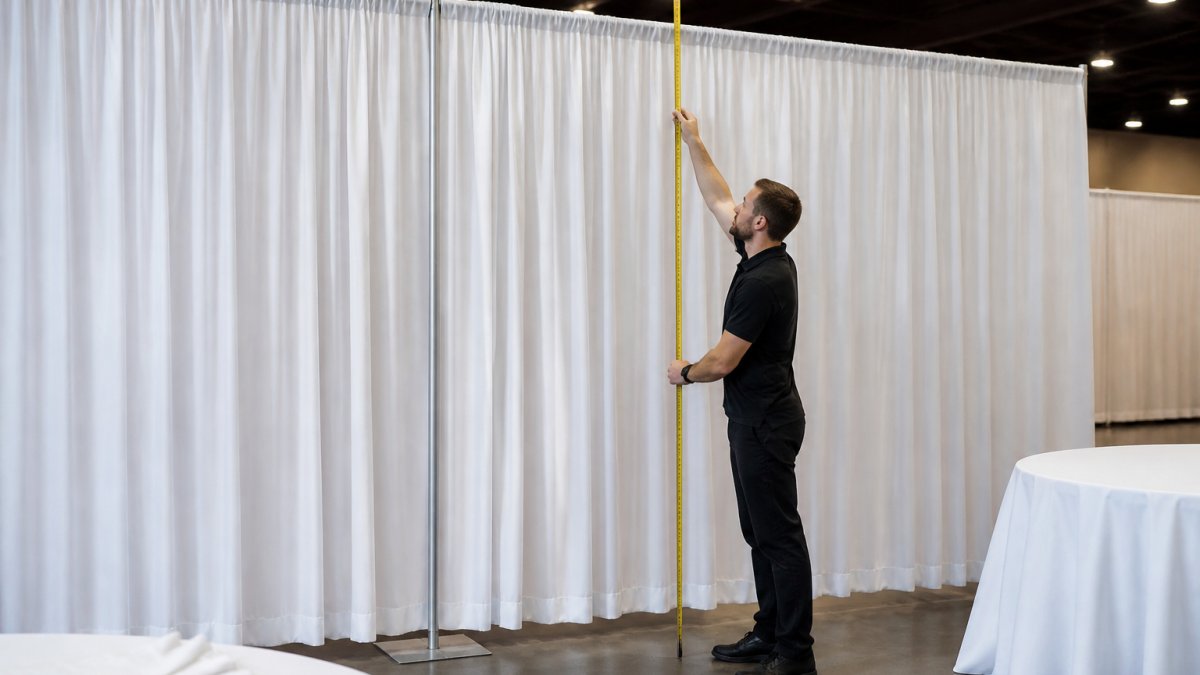
You'll need a rubber mallet, level, step ladder, work gloves, and measuring tape for assembly and alignment verification.
Check base plate weight capacity before purchasing. Undersized bases tip or shift during events, confirm your base plate rating accommodates total fabric weight.
Inspect all components before installation day for bent uprights, damaged crossbars, or missing connectors. Event Drape Rental's professional inventory checks ensure everything arrives in perfect condition.
Pipe and Drape Installation Guide: Step-by-Step Setup
Assembling Base Plates and Uprights
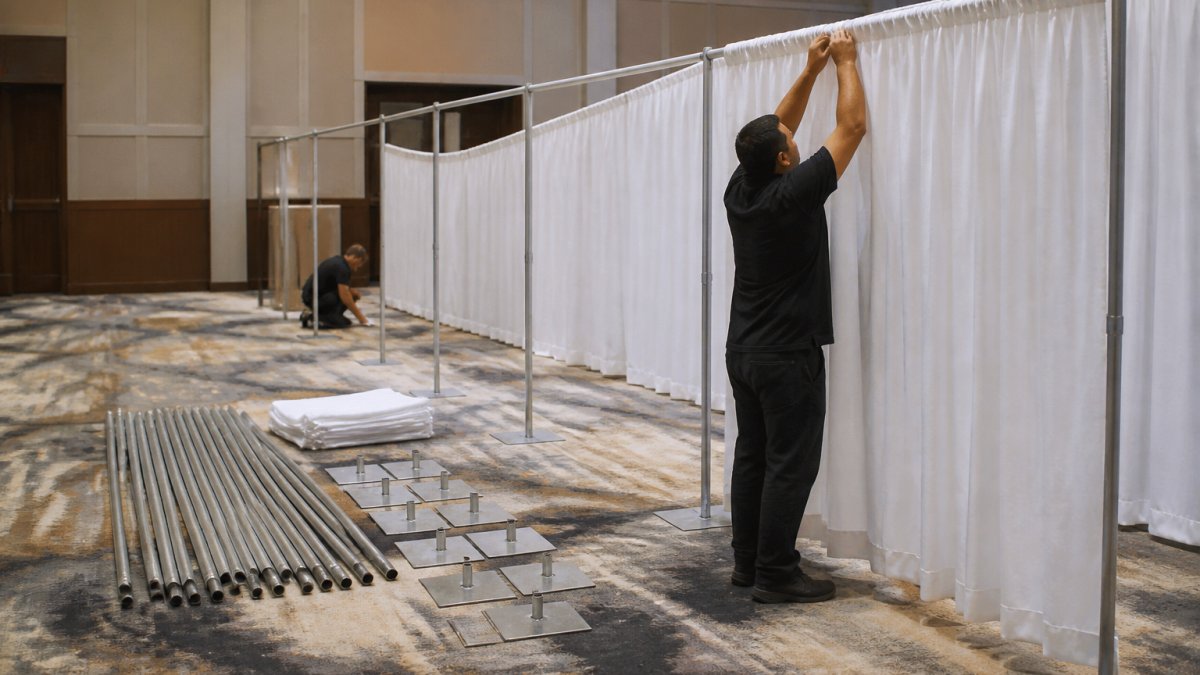
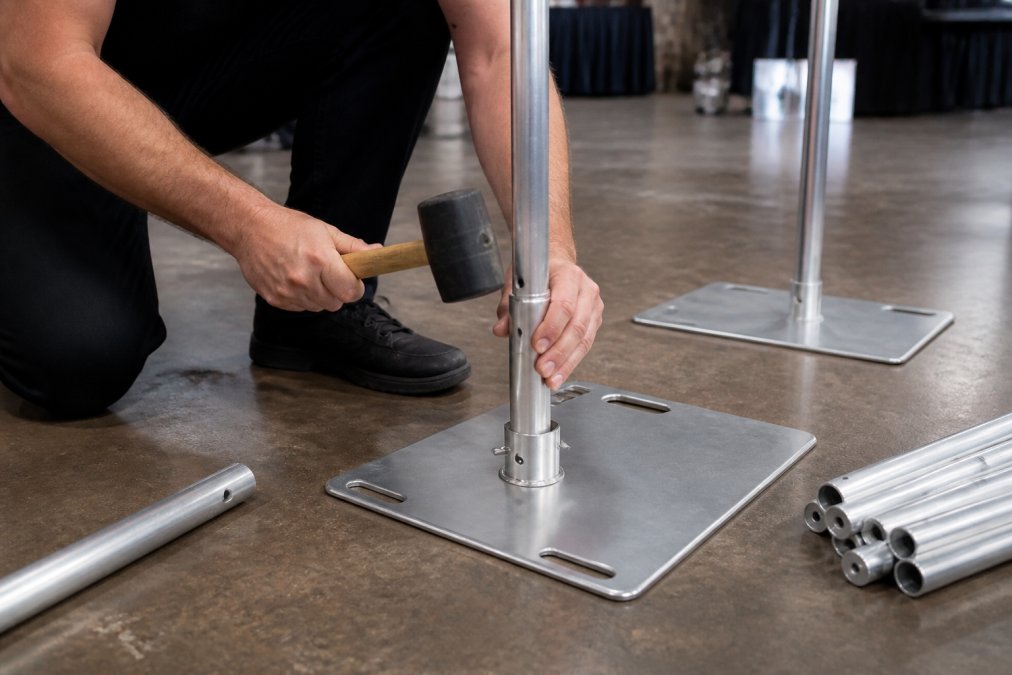
Lay out base plates in a grid pattern on level ground. Space uprights approximately 8 feet apart for standard configurations, adjusting based on fabric weight and ceiling height.
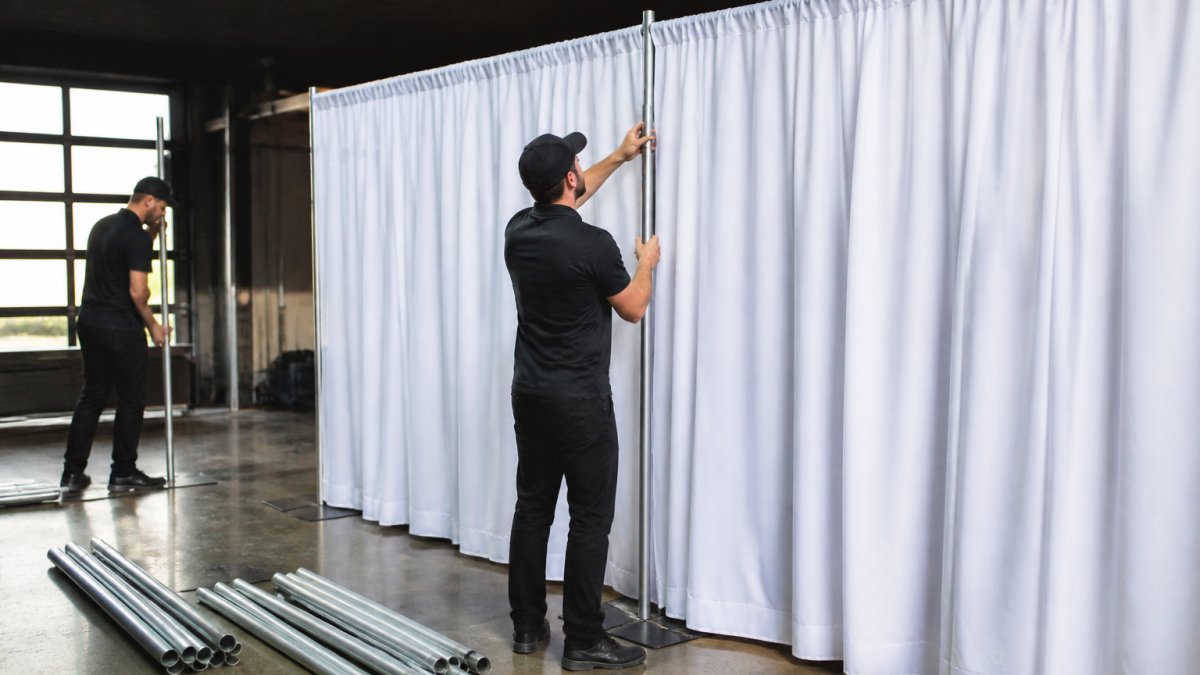
Insert uprights and hand-tighten the locking mechanism. Use a level to verify each upright is perfectly vertical, even slight tilts compound with height and weight. Once confirmed, fully tighten using gentle mallet strikes.
Installing Crossbars and Securing Fabric
Install crossbars horizontally between uprights at your desired height. Ensure crossbars are level before fully securing, uneven crossbars cause fabric to sag unevenly.
Hang fabric using clips or sewn attachments, spaced evenly every 12-18 inches to distribute weight uniformly. Pull fabric taut without stressing attachment points.
For ceiling treatments, attach fabric to crossbars at the top and secure the bottom edge to base plates or floor anchors to create tension and prevent billowing.
How to Hang Ceiling Drapes Without Damaging Ceiling
Ceiling treatments involve weight suspended above attendees, making weight-bearing limits and venue structural requirements non-negotiable.
Weight-Bearing Capacity and Load Calculations
Before hanging ceiling drapes, determine your system's weight capacity and total fabric weight.
Standard base plates support 50-150 pounds per upright; ceiling-rated crossbars support 100-300 pounds of distributed load. These limits assume even weight distribution. A crossbar with fabric concentrated in the center fails at a lower threshold than one with weight spread across multiple support points.
Fabric weight varies dramatically by material:
- Sheer fabrics (chiffon, voile): 1.5 to 3 ounces per square yard
- Medium-weight fabrics (polyester, cotton blends): 4 to 8 ounces per square yard
- Heavy fabrics (velvet, blackout): 10 to 16 ounces per square yard
A 10×20 ft ceiling drape in chiffon weighs 30-60 lbs; in velvet, it exceeds 160 lbs. Calculate total yardage × fabric weight per square yard. If total exceeds system capacity by more than 20%, upgrade to a heavier-duty system.
Venue Structural Compliance
Never assume your venue's ceiling can support additional load. Contact your venue manager before installation and request written confirmation of:
- Maximum load allowed on ceiling structures or beams
- Whether direct attachment to beams or ceiling elements is permitted
- Insurance requirements for temporary structures
- Any venue-specific installation guidelines
Many venues require a structural engineer's sign-off for ceiling treatments exceeding 100 pounds. Budget $300-$800 for structural assessment and written clearance.
Safe Installation Methods for Ceiling Drapes
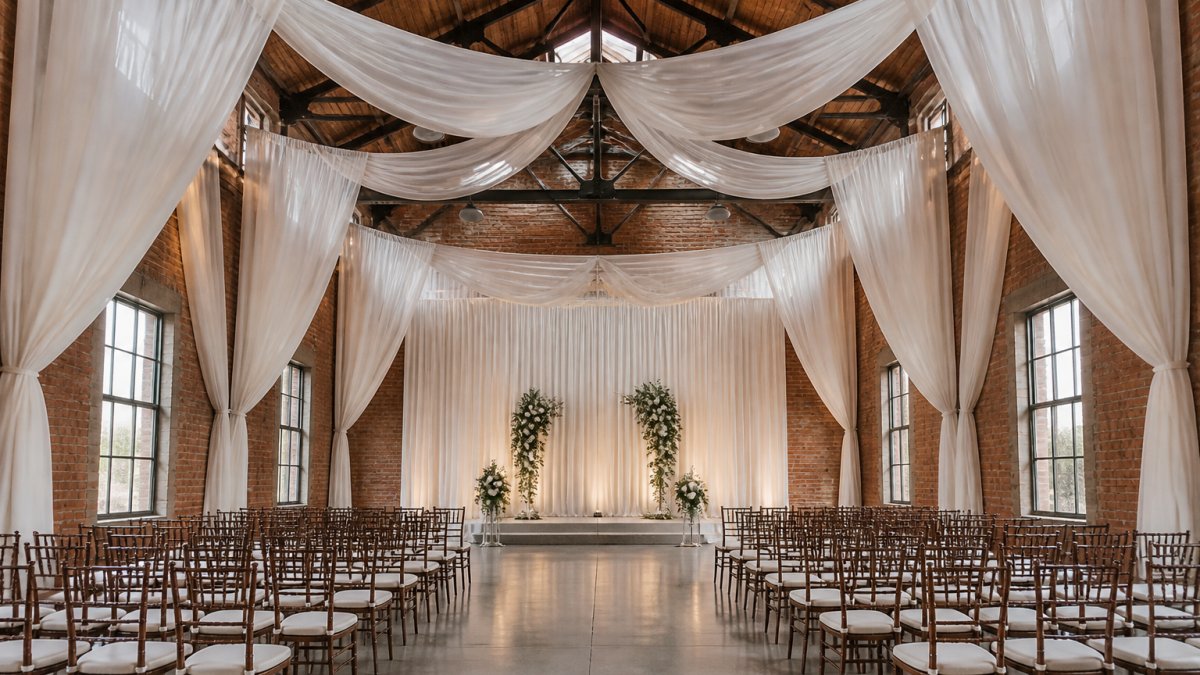
The safest approach uses your pipe and drape framework to create a suspended structure independent of the ceiling. Install tall uprights (12-16 feet) anchored to weighted base plates, run crossbars at ceiling height, and hang fabric from the crossbars. The system supports all weight; your ceiling remains untouched.
This method eliminates structural concerns but requires more floor space for base plates and uprights.
If your venue permits direct attachment to exposed beams, use beam clamps rated for at least 1.5× your total fabric weight. This is a professional-level technique; hire a professional if uncertain about structural capacity or installation.
If neither method works, use fabric panels suspended from your crossbar network instead of full ceiling coverage. Panels reduce weight, simplify installation, and distribute load more evenly.
Secondary Safety Measures
Use safety cables rated for your total fabric weight, attached from crossbars to structural elements or additional uprights. Safety cables prevent catastrophic failure and cost $15-$40 per cable.
Inspect all attachment points 30 minutes before guests arrive for visible movement, sagging, or stress. If anything appears unstable, adjust or remove the treatment, no aesthetic enhancement is worth injury risk.
Professional Drape Installation Services vs. DIY
Choose DIY for straightforward layouts in accessible spaces to save on labor and maintain control. Professional installation handles complex configurations, high ceilings, and tight timelines.
Event Drape Rental offers both options. For DIY, rent components and assemble yourself. For professional installation, technicians arrive with tools and expertise, handle setup, and coordinate with vendors.
Common Installation Mistakes to Avoid
Weight Distribution and Structural Failure
The most dangerous mistake is underestimating weight concentration. Hanging too much fabric on a single section or loading one side unevenly creates stress that destabilizes the entire framework.
A typical failure: a 20-foot velvet backdrop on two end uprights concentrates 100+ pounds in the crossbar center, creating a lever effect that pulls uprights inward. Base plates tip or shift, the structure leans, and fabric sags visibly.
Prevent this by spacing uprights 6-8 feet apart for heavy fabrics (velvet, blackout) instead of the standard 8-12 feet.
Fabric Selection for Lighting and Acoustics
Choosing fabric based solely on color without considering light transmission or sound absorption diminishes event quality.
For backdrops and room dividers:
- Sheer fabrics (chiffon, voile) allow light through, creating a glowing effect when lit from behind. Use only where background is intentionally visible or layered over opaque backing.
- Semi-opaque fabrics (poly-premier, cotton blends) block most light while allowing diffusion. They provide privacy and hide unsightly backgrounds, the most versatile choice.
- Opaque fabrics (velvet, blackout) completely block light and hide everything. Ideal for dramatic backdrops and hiding infrastructure, but heavier and requiring stronger support.
For ceiling treatments and enclosed spaces where acoustics matter:
- Lightweight fabrics absorb minimal sound and can make spaces feel echoey and harsh.
- Medium-weight fabrics (4 to 8 ounces per square yard) provide modest sound absorption, improving acoustics without excessive weight.
- Heavy fabrics (velvet, 10+ ounces per square yard) absorb significant sound and reduce reverberation, creating a warmer, more intimate acoustic environment. This is why high-end event venues often use velvet draping, it improves both aesthetics and how the space sounds.
Leveling and Alignment Verification
Skipping the leveling step is a classic pitfall. Unlevel uprights compound issues as you add height and fabric. What looks "close enough" during assembly becomes obviously crooked once fabric hangs and lighting illuminates the space.
Use a 4-foot level at every stage of assembly:
- After placing base plates, verify the ground is level. Shim base plates if necessary using metal shims or rubber wedges.
- After inserting uprights, check vertical alignment in two directions (front-to-back and side-to-side). Even a 1-degree tilt becomes visible over 12 feet of height.
- After installing crossbars, verify they are level. Unlevel crossbars cause fabric to sag unevenly and look unprofessional.
- After hanging fabric, step back 20 feet and visually inspect the entire structure. Lighting will reveal any misalignment that a level might miss.
Undersized Base Plates and Tipping Risk
Base plate capacity is not a suggestion, it is a hard limit. Standard base plates rated for 100 pounds will fail if you load them with 150 pounds of fabric, especially if weight is concentrated on one side.
Neglecting Secondary Safety Measures
Even well-assembled systems benefit from backup anchoring. Use safety cables, guy-wires, or additional bracing to prevent catastrophic failure if a base plate shifts or a crossbar connection loosens. In high-traffic event spaces where guests might bump into structures or where children are present, secondary safety measures are essential.
Customization Options for Backdrops and Room Dividers
Pipe and drape systems excel at customization. Backdrop applications use the framework to display fabric behind speakers, gift tables, or ceremony spaces. You control fabric color, pattern, and height to match your event theme. Event Drape Rental maintains extensive inventory featuring over 100+ colors and 6 different fabric materials, allowing precise aesthetic matching.
Frequently Asked Questions
Can I install pipe and drape myself, or should I hire professionals?
DIY pipe and drape installation is possible if you have basic tools, understand weight-bearing limits, and allow adequate setup time. However, professional installation ensures structural integrity, proper tension systems, and compliance with venue requirements. For ceiling treatments or installations over 15 feet, professional services are strongly recommended due to safety and stability concerns. Professionals handle logistics, alignment, and day-of coordination, reducing setup errors.
How do you hang ceiling drapes without damaging the ceiling?
Use tension systems or ceiling-mounted suspension equipment designed for temporary installations rather than drilling into surfaces. Install crossbars using adjustable clamps that distribute weight evenly across beams or structural supports. Avoid fastening directly to drywall or acoustic tiles. Professional installers assess weight-bearing capacity before hanging fabric. For venues with sensitive ceilings, use ground-supported clearspan structures or portable systems that don't require ceiling attachment.
What is the difference between temporary and permanent pipe and drape installations?
Temporary installations use modular components assembled for single events and removed afterward, ideal for weddings and private celebrations. They rely on base plates, uprights, and crossbars that require no permanent structural changes. Permanent installations involve fixed mounting to building structures and are suited for venues or spaces used repeatedly. Temporary systems offer flexibility in customizable layout and space division without venue compliance concerns tied to permanent modifications.
How much fabric do I need for a backdrop or room divider?
Calculate fabric requirements by multiplying the desired height (12 to 30 feet for most events) by the width you want to cover. Account for fabric draping style, flat panels require less than gathered or swag designs. For room dividers, measure the space you're dividing and add 10-15% extra for proper tension and aesthetic appearance. Consult with rental professionals to confirm exact yardage based on your specific event space and design preferences.