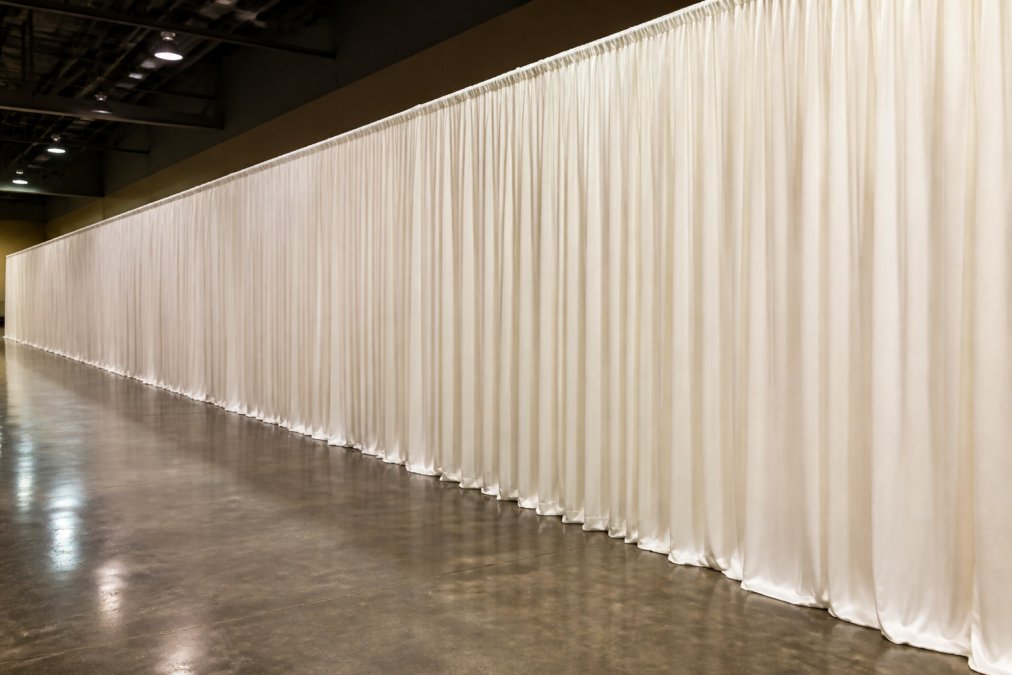
 how-to
Wall to Wall Draping: A Step-by-Step Guide
Table of Contents
- What Wall to Wall Draping Is and Why It Transforms Venues
- Understanding Pipe and Drape Height Requirements
- Selecting the Right Fabrics for Wall to Wall Draping
- Calculating Event Fabric Yardage for Your Project
- Pipe and Drape Installation Guide: Hardware and Assembly
- DIY vs. Professional Installation: What You Need to Know
- Advanced Draping Techniques: Lighting Integration and Room Dividers
- Frequently Asked Questions
Last Updated: September 20, 2026
What Wall to Wall Draping Is and Why It Transforms Venues
Wall to wall draping is the practice of covering interior surfaces, walls, ceilings, and structural elements, with fabric to completely transform a venue's appearance. Unlike partial draping that accents specific areas, wall to wall draping creates an immersive environment by establishing a unified aesthetic from floor to ceiling. This approach works because it eliminates visual distractions, creates spatial cohesion, and allows event planners to control every sightline within a room.
The core advantage is psychological. When attendees enter a space wrapped entirely in coordinated fabric, they're in whatever world you've created, a corporate gala becomes intimate, a trade show booth becomes branded, a wedding becomes a personal sanctuary. This transformation makes venues feel intentional and professionally executed, directly influencing guest perception.
Event Drape Rental specializes in this transformation, offering drapes ranging from 12 to 30 feet in height with over 100 colors and 6 different fabric materials. Whether you're managing a wedding, corporate function, or trade show, understanding how to plan and execute wall to wall draping will determine whether your venue looks spectacular or falls short.
Understanding Pipe and Drape Height Requirements
Pipe and drape height depends on ceiling height, desired visual effect, and installation constraints. Drapes that don't reach the floor look unfinished; drapes exceeding ceiling height become impossible to install safely.
Standard Heights for Different Venues
Standard ballrooms (12-14 feet) use 12-16-foot drapes, covering walls while leaving space for lighting and ventilation. Convention centers and warehouses (20-30 feet) require 20-30-foot drapes to avoid a "floating" effect and create proper visual closure.
Irregular-height venues (lofts, barns) require mixed draping heights. Use taller drapes in high-ceiling areas and standard heights elsewhere, blending with careful fabric selection to avoid jarring transitions.
Trade show booths typically use 10 to 12-foot drapes because booth spaces are smaller and overhead clearance matters for sightlines from the trade show floor. Going taller than necessary wastes fabric and creates visual imbalance in a confined space.
Measuring Your Space Accurately
Measure from floor to desired endpoint (ceiling, beam, or architectural feature) at multiple points along each wall using a laser measure or tape, as venues often aren't perfectly square or level.
Document ceiling height at highest and lowest points and note structural obstacles (columns, beams, HVAC vents, sprinklers). These measurements form the foundation for accurate quotes and successful installation.
Selecting the Right Fabrics for Wall to Wall Draping
Fabric choice affects aesthetics and functionality. The right fabric creates visual impact while performing reliably and meeting safety standards.
Fabric Types: Velvet, Chiffon, Satin, and Sheer Options
Velvet is the gold standard for formal events, offering rich depth and luxurious appearance. It hangs cleanly without excessive wrinkles but is heavier, requiring stronger hardware and more labor.
Chiffon offers a soft, ethereal look and is the most affordable option, but shows wrinkles and requires careful handling and pressing before events.
Satin provides a middle ground with subtle sheen and polished appearance, easier to maintain than chiffon and lighter than velvet.
Sheer fabrics (voile, tulle) create layering effects and allow light to pass through but require combination with opaque fabrics for coverage. Lighting integration creates dramatic effects for trade shows and contemporary events.
Fire Retardant Standards and Safety Compliance
All commercial event draping must meet NFPA 701 Standard for Flame Propagation of Textiles and Films. Compliant fabrics are treated with fire retardant chemicals during manufacturing or after production.
Professional providers like Event Drape Rental ensure NFPA 701 compliance. If purchasing directly, request fire retardant certification documentation. Non-compliant draping can result in event cancellation, fines, or liability issues.
Calculating Event Fabric Yardage for Your Project
Correct fabric calculation is essential for budgeting and ensuring wall to wall draping covers without gaps or excessive overlap.
Formula for Measuring Linear Feet and Width
Start with linear feet, the total horizontal distance your drapes will cover. For example, three 40-foot walls = 120 linear feet.
Determine vertical drop, distance from pipe top to fabric end (typically floor plus 1-2 inches for overlap).
The basic formula is: Linear Feet × Vertical Drop = Total Square Footage
Using the example above: 120 feet × 14 feet = 1,680 square feet of fabric needed.
Professional rental companies calculate yardage from linear footage and vertical drop using their fabric specifications.
Accounting for Pleating and Swag Design
Pleating and swag design require additional fabric: simple gathered headers add 20-30%, deep pleating adds 40-50%.
Swag design (fabric draping in curves) adds 15-25% to overall yardage.
Event Drape Rental advises on exact yardage based on design preferences.
Pipe and Drape Installation Guide: Hardware and Assembly
Understanding hardware and assembly is critical for DIY or professional installations. The system is straightforward once you understand the components.
Essential Hardware: Uprights, Crossbars, and Base Plates
Key components: Uprights (vertical pipes, 1.5-2 inches diameter, standard heights 8-30 feet), Crossbars (horizontal pipes connecting uprights at top), Base plates (weighted feet anchoring uprights to floor).
Additional hardware: C-clamps (secure crossbars to uprights), hanging hardware (chains, clips, hooks), connectors (join pipes).
The system is modular. A 40-foot wall with 12-foot height requires four uprights spaced 10 feet apart, connected by crossbars at top.
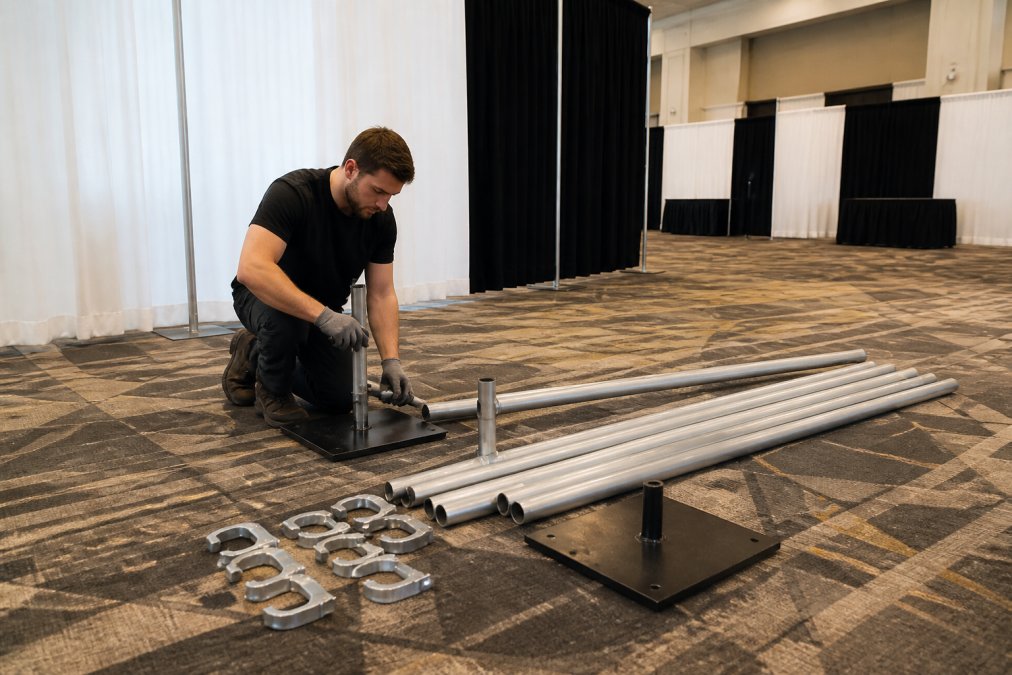
Step-by-Step Assembly Process
Step 1: Plan Your Layout Uprights are spaced 10 feet apart for stability. For a 40-foot wall, mark four base plate locations using tape.
Step 2: Position Base Plates Place base plates at marked locations on level ground. Use shims if the floor slopes.
Step 3: Insert Uprights Insert uprights into base plate sleeves. Connect two-piece uprights per manufacturer instructions. Uprights should stand vertically without wobbling.
Step 4: Attach Crossbars Position crossbars across uprights and secure with C-clamps. Tighten firmly without over-tightening. Ensure crossbars are level.
Step 5: Install Hanging Hardware Attach hanging hardware to crossbar every 12-18 inches to distribute fabric weight evenly.
Step 6: Hang Fabric Attach fabric header to hanging hardware, working across crossbar with consistent tension.
Securing Drapes to Prevent Sagging and Movement
Prevent sagging by using hanging hardware every 12-18 inches, ensuring tight connections, and verifying the crossbar isn't sagging.
DIY vs. Professional Installation: What You Need to Know
The choice depends on budget, timeline, technical comfort, and project complexity. The trade-off is time, labor, and risk.
When to Choose DIY Draping
DIY works for smaller projects: single walls, photo backdrops, or booth drapes manageable for a small team in a few hours.
Benefits of Professional Installation
Professional installers bring speed, expertise, and reliability. They handle unexpected challenges, uneven floors, irregular heights, structural obstacles, without improvisation.
Common Installation Mistakes and How to Avoid Them
Mistake 1: Inadequate Base Plate Weighting Use heavy-duty base plates rated for drape weight or add sandbags. Weight is critical for tall drapes.
Advanced Draping Techniques: Lighting Integration and Room Dividers
Once you've mastered basic wall to wall draping, lighting integration and spatial division techniques create sophisticated, memorable environments.
Incorporating Lighting Into Your Drape Design
Lighting and draping work together to create atmosphere. Uplighting, fixtures that point upward from the floor, illuminates fabric from below, creating depth and color saturation. A white drape lit with blue uplighting becomes an icy, modern backdrop. The same drape with warm amber lighting feels intimate and romantic.
Creating Spatial Division and Venue Transformation
Wall to wall draping divides large spaces into intimate areas. A 10,000-square-foot ballroom becomes a series of smaller, more manageable spaces when you drape sections off. This technique works for multi-purpose events where different activities happen in different areas.
| Aspect | DIY Installation | Professional Installation |
|---|---|---|
| Timeline | Varies by project | Varies by project |
| Labor Cost | Minimal (your team) | Additional cost |
| Expertise | Requires learning curve | Handled by experienced crew |
| Risk | Higher (setup errors) | Lower (insured, accountable) |
| Best For | Small, simple projects | Large or complex events |
Frequently Asked Questions
How do you calculate the amount of fabric needed for wall to wall draping?
Measure the linear feet of wall space you're covering, then multiply by the desired height in feet. Add 15-20% extra fabric for pleating and swag effects. For example, a 20-foot wall at 12 feet high requires roughly 240 linear feet of fabric, plus additional yardage for aesthetic draping. Using an event fabric yardage calculator or consulting with a professional ensures you account for fabric width and any custom design elements you want to incorporate.
What are the standard pipe and drape height requirements for different venues?
Most venues accommodate drapes ranging from 12 to 30 feet tall. Standard ceiling heights in ballrooms and conference spaces typically support 12-16 foot drapes. High-ceiling warehouses and converted industrial spaces can handle 20-30 foot installations. Always measure your specific venue's ceiling height, structural supports, and any obstacles like beams or lighting rigs. Some venues have restrictions on where uprights can be placed, which affects your pipe and drape height options.
Can you install wall to wall draping without damaging venue walls?
Yes. Pipe and drape systems use freestanding uprights and base plates that sit on floors, requiring no wall attachment. The drapes hang from horizontal crossbars supported by the uprights, so no nails, screws, or adhesives touch venue surfaces. This makes wall to wall draping ideal for rented spaces, historic venues, or locations with strict damage policies. Always verify with your venue that freestanding systems are permitted and that floor weight limits accommodate the hardware.
What fabric materials work best for wall to wall event draping?
All professional-grade event draping must meet flame retardant standards required by most venues. Choose based on your event's aesthetic, lighting design, and whether you need light control or transparency.