 how-to
7 Steps to Install a Wedding Ceremony Backdrop Like a Pro
Last Updated: October 26, 2026
Quick Summary
Wedding ceremony backdrop installation requires assembling modular components including upright poles, base plates, crossbars, and connectors, then securing fabric panels with clips spaced 12 to 18 inches apart. A simple two-upright rectangular backdrop takes 30 to 45 minutes with proper tools and two to four people.
- Upright poles range from 7 to 12 feet tall and must be perfectly vertical using a level to prevent fabric bunching
- Base plates need one per upright pole and must sit flat on the floor, with pins locking poles vertically in place
- Fabric clips should be spaced 12 to 18 inches apart across the crossbar to prevent sagging and maintain professional appearance
- Most standard backdrop stands safely support 50 to 100 pounds of fabric and decorations combined
- Installation takes 30 to 45 minutes for simple designs and 60 to 90 minutes for complex arches, requiring two to four people
Table of Contents
- What You'll Need Before Installing Your Wedding Ceremony Backdrop
- Understanding Your Wedding Backdrop Stand Setup Components
- Step-by-Step Wedding Backdrop Installation Process
- How to Hang Drapes on a Backdrop Stand Properly
- Wedding Backdrop Stand Safety Essentials
- Wedding Backdrop Setup Checklist for Flawless Execution
- Common Installation Mistakes to Avoid
- Timeline and Crew Planning for Your Wedding Backdrop Installation
- Frequently Asked Questions
What You'll Need Before Installing Your Wedding Ceremony Backdrop
Wedding ceremony backdrop installation requires the right tools, not fancy ones.
Here's what to have on hand:
- Adjustable upright poles (typically 7-12 feet tall, depending on your venue)
- Base plates with pins to stabilize the frame
- Crossbars and connectors to link poles together
Components vary by style: a simple rectangular frame uses fewer pieces than a curved arch, and round or square arches need different connectors. Know your design before gathering materials.
Missing a single pin or fastener can delay your entire installation.
Understanding Your Wedding Backdrop Stand Setup Components
Your wedding backdrop stand is built from modular pieces that lock together. Understanding each component prevents confusion during assembly.
Base plates and feet
Pins run through the base plate and pole, locking the pole vertically and preventing wobble.
Choose heavy-duty steel base plates; lightweight aluminum bends under tension. Pins should fit snugly without force, too loose won't hold, and one that needs a hammer is the wrong fit.
Base plates come in different sizes depending on your pole diameter. Verify compatibility before assembly.
Upright poles and connectors
Upright poles are the vertical backbone of your wedding backdrop stand.
Connectors are metal sleeves or clamps that slide over pole ends and tighten with screws or pins, preventing rotation or slipping under fabric weight.
Wipe each connector clean of dirt or rust before use; debris prevents a tight connection.
Uprights must be perfectly vertical or fabric bunches on one side, which is why a level is essential during setup.
Crossbars and fasteners
Crossbars run horizontally between upright poles and hold the fabric panels. They're typically the same diameter as uprights, so standard connectors work.
Fasteners, screws, bolts, and clamps, hold crossbars in place and create a rigid frame. Hand-tighten every one, then recheck after 30 minutes.
Crossbars can sag under heavy fabric; those over 10 feet may need a vertical support pole in the middle to keep drapes hanging straight.
Step-by-Step Wedding Backdrop Installation Process
Follow these steps in order for proper wedding ceremony backdrop installation; skipping or reordering them causes alignment problems and wasted time. For comprehensive guidance, see how to install pipe and drape step by step.
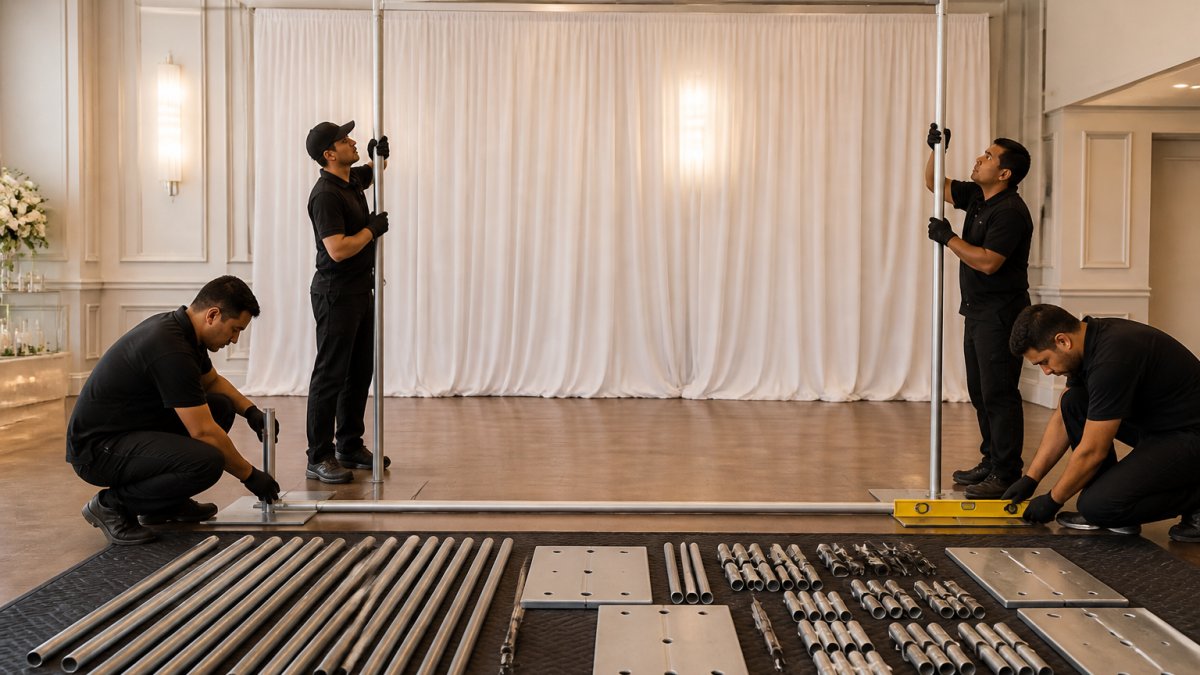
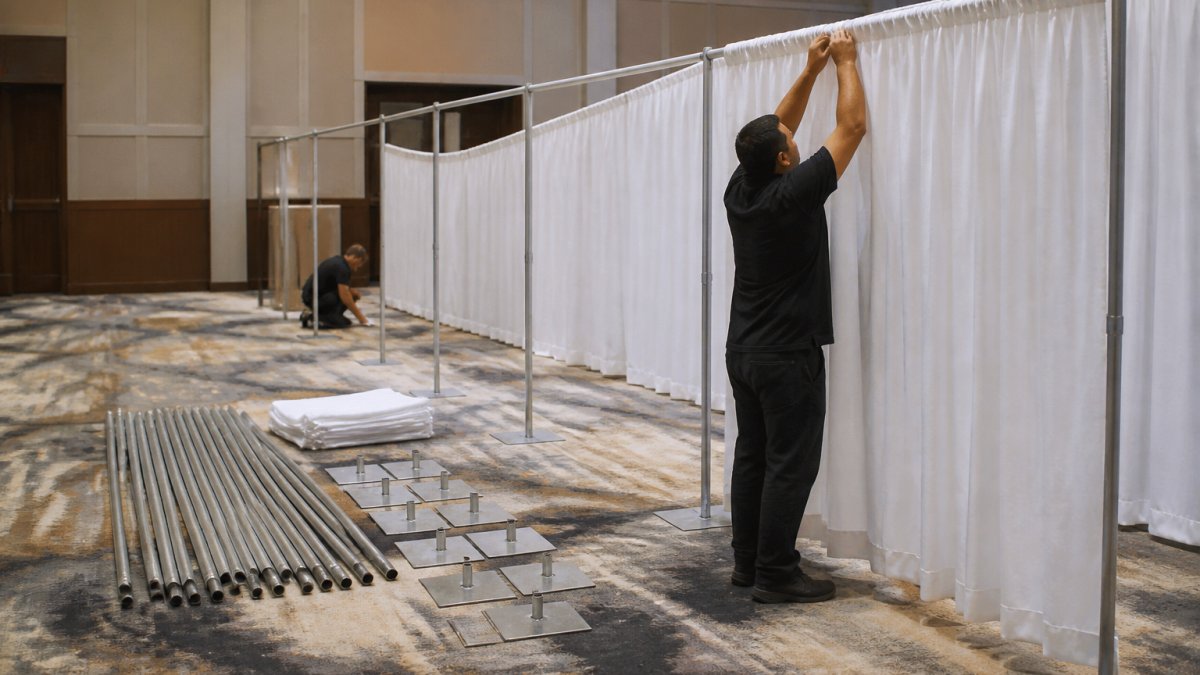
Step 1: Unpack and inspect all components
Lay out every component on a clean, flat surface and check against your list. Missing even one piece stops your installation.
Inspect each piece for bent poles, cracked connectors, or missing pins, a bent upright won't stand vertical no matter how you adjust it.
Test that all fasteners turn freely; spray rusty or stuck screws with penetrating oil, then wipe clean.
Step 2: Assemble the base frame
Position your base plates and use a tape measure to verify spacing matches your design; for a rectangular backdrop, they should be parallel and level.
Insert pins through the base plates and slide the upright poles on.
Don't tighten anything yet, just get the poles standing loosely for adjustment in the next steps.
Check that both uprights are roughly vertical; they shouldn't lean noticeably.
Step 3: Connect upright poles
With two uprights, attach the crossbar at your fabric height, usually 6 to 8 feet, leaving room for florals or lighting on top.
Slide connectors over the crossbar ends at each upright, then hand-tighten all fasteners snug but not forced.
Finish with a wrench, applying firm pressure without over-tightening, that strips threads and cracks connectors.
Step back: the crossbar should be level. If it sags, loosen the fasteners, adjust, and re-tighten.
Step 4: Attach crossbars and arch sections
A simple rectangular backdrop is done at this step; an arch or complex design needs additional crossbars to create the shape.
Arch sections bolt to the top of the uprights and curve outward; position them symmetrically, since a leaning arch looks unprofessional.
Tighten all arch fasteners and recheck after 15 minutes, since metal expands slightly as you work and connections can loosen.
Step 5: Level and adjust stand height and width
Place your level along the crossbar and adjust the base plates or fasteners until it's level.
Check each upright with your level; if one leans, loosen the base plate pin and adjust its position slightly.
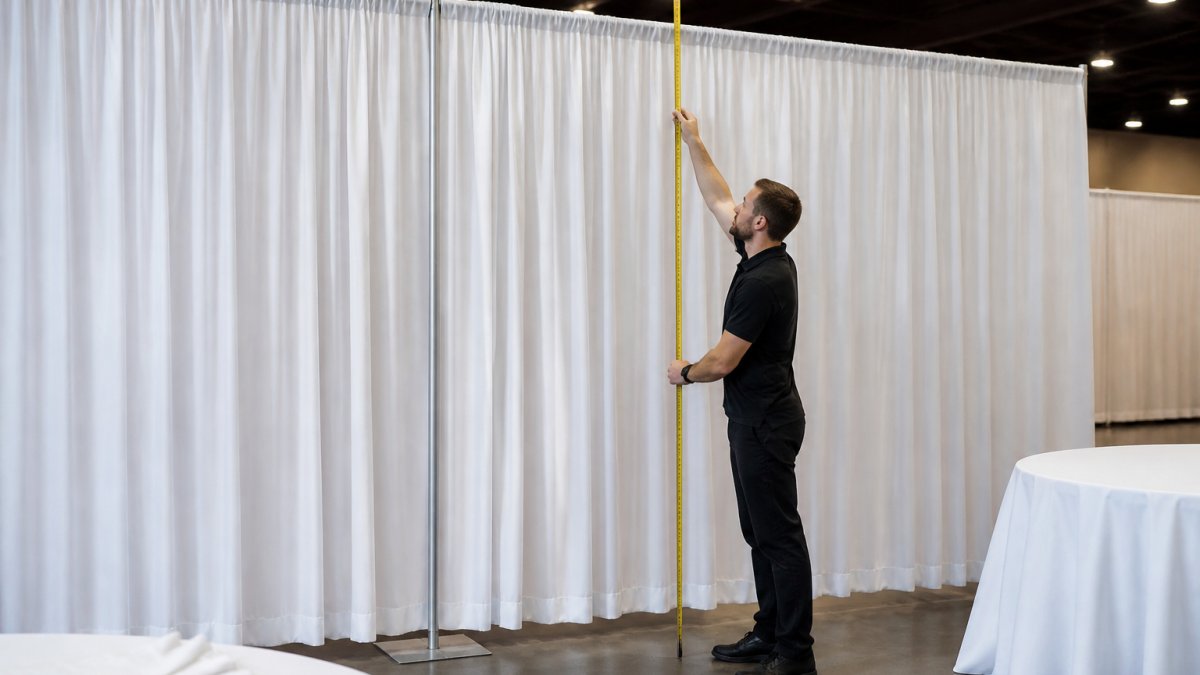
Verify overall width and height with your tape measure, floor to crossbar, and left upright to right upright.
Make small adjustments now. Large adjustments later cause fabric misalignment.
How to Hang Drapes on a Backdrop Stand Properly
Your frame is assembled and level. Now for the fabric.
Securing fabric panels and curtains
Add clips every 12 to 18 inches across the crossbar, farther apart causes sagging, closer wastes clips and complicates adjustment.
Smooth out wrinkles and bunches as you go; smooth fabric looks professional, wrinkled fabric looks rushed.
With multiple panels, overlap them slightly where they meet to hide seams and create a continuous look.
Ensuring even draping and tension
Tension is key: too little and fabric bunches; too much and it stretches and distorts.
Pull fabric gently from the bottom into a slight curve, it should hang in a smooth, graceful drape, not tight like a drum.
Check that both sides have equal tension; one side shouldn't sag more than the other.
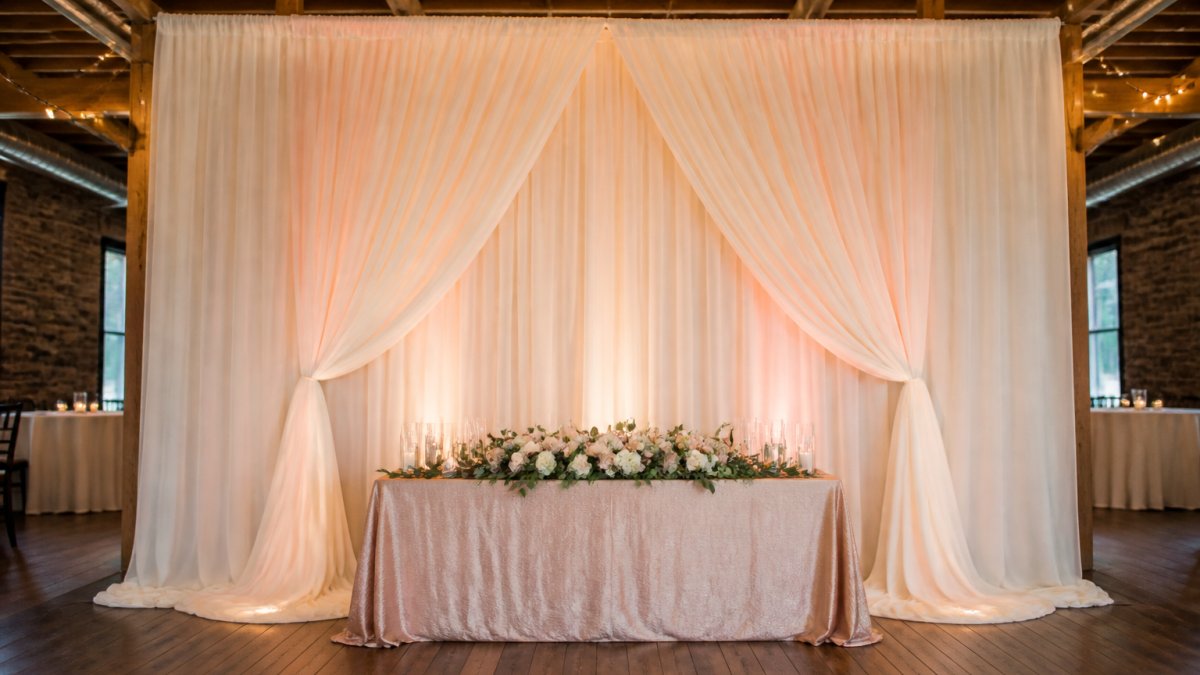
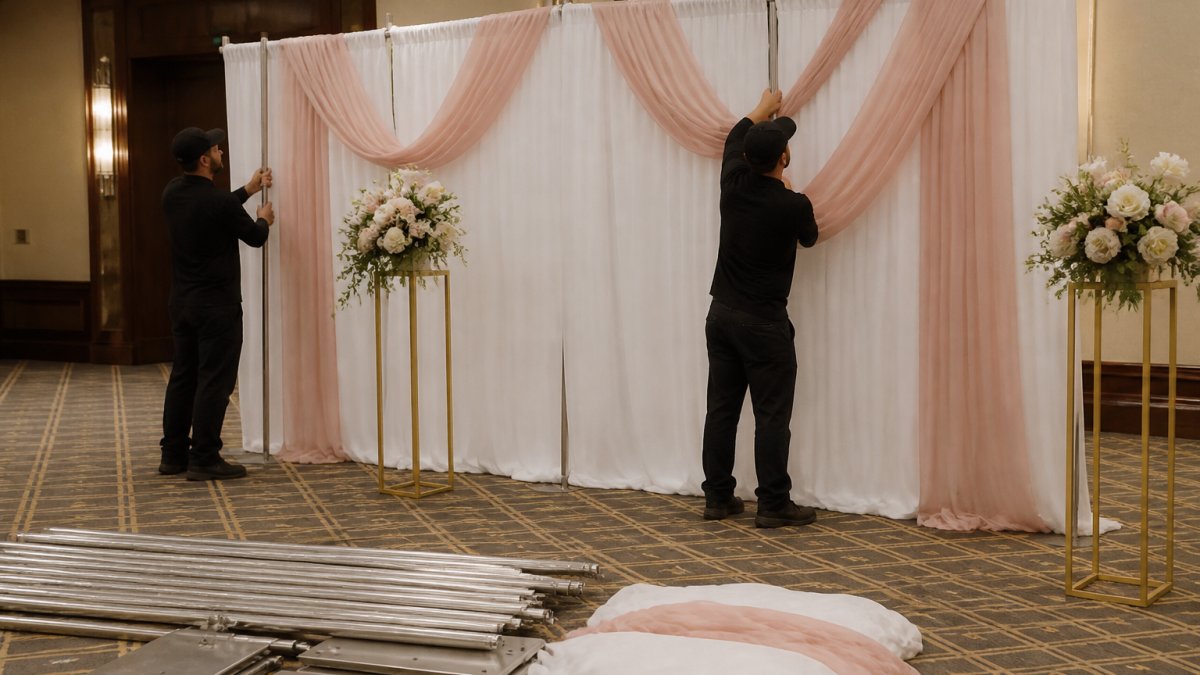
For decorative draping, start at the center top and swoop down to each side, securing the fabric with clips or safety pins. Learn how to create romantic wedding backdrop drapes for elegant effects.
Step back frequently, what looks right up close may look wrong from 10 feet away, where guests see it.
Weight capacity and decoration limits
Your frame has weight limits; exceeding them can collapse or tip it over.
Most standard stands safely support 50 to 100 pounds of fabric and decorations.
Distribute weight evenly across the crossbar; don't hang all heavy items on one side.
When in doubt, use a lighter fabric: chiffon and organza create romantic looks and weigh far less.
Wedding Backdrop Stand Safety Essentials
A beautiful backdrop is useless if it's unsafe; guest safety comes first.
Stabilizing your backdrop for guest safety
A wobbly backdrop is dangerous: guests could bump it over, children might climb it, and wind could tip it. Review pipe and drape setup tips for weddings to ensure stability and guest safety.
Check every fastener before guests arrive, then gently push the backdrop; it shouldn't move or sway.
Base plates must sit flat on the floor, carpet compresses and shifts them.
Recheck uprights with your level even if you checked earlier; a slight lean causes instability, and conditions change as fabric weight is added.
Venue-specific considerations and anchoring
Venues differ: a concrete ballroom floor is stable; outdoor grass is not.
For outdoor installations, drive metal ground anchors or stakes through the base plates, at least two per plate, to prevent sliding.
On sloped floors, shim the base plates level to avoid uneven weight distribution and instability.
For extra anchoring, use weight-bearing walls and support columns, never drywall alone, which won't support the load.
Wind and outdoor installation precautions
Outdoor installations are beautiful but risky; wind can topple a backdrop and endanger guests.
Check the forecast: if winds exceed 15 mph, reconsider the outdoor backdrop or take extra precautions.
Anchor every base plate with multiple ground anchors where possible, and add sandbags for weight and stability.
Position the backdrop perpendicular to prevailing winds so wind hits it from the side, not head-on, reducing wind load.
Wedding Backdrop Setup Checklist for Flawless Execution
Check off each item as you complete it.
| Task | Status | Notes |
|---|---|---|
| Gather all components and tools | ☐ | Verify against component list |
| Inspect components for damage | ☐ | Report any bent or broken pieces |
| Position base plates at correct spacing | ☐ | Use tape measure to verify |
| Insert pins and position uprights | ☐ | Check for vertical alignment |
| Attach crossbar with connectors | ☐ | Tighten all fasteners by hand first |
| Verify crossbar is level | ☐ | Use spirit level lengthwise |
| Check uprights for vertical alignment | ☐ | Use level on each pole |
| Attach fabric panels to crossbar | ☐ | Space clips 12-18 inches apart |
| Smooth fabric and eliminate wrinkles | ☐ | Check from 10 feet away |
| Add decorative elements (flowers, lighting) | ☐ | Verify weight doesn't exceed capacity |
| Verify all fasteners are tight | ☐ | Walk around and gently push on frame |
| Check base plates are secure | ☐ | Add anchors or weights if needed |
| Final walkthrough and photo | ☐ | Document appearance before guests arrive |
Common Installation Mistakes to Avoid
Skipping the inspection step. A bent pole ruins your entire frame, so inspect everything before assembling.
Ignoring the level. A backdrop that looks straight might lean; trust the tool, not your eye.
Overloading with decorations. Calculate total weight before installation, distribute evenly, and don't exceed capacity.
Forgetting about wind. Anchor an outdoor backdrop even if the forecast is calm, weather changes.
Timeline and Crew Planning for Your Wedding Backdrop Installation
Know how long installation takes and who you need.
A complex arch or multi-section backdrop takes 60 to 90 minutes, with more connections and fabric to handle.
A simple two-person installation takes 60 to 90 minutes; a complex design with decorations takes 2 to 3 hours.
Have a backup plan: know which decorative elements you can skip and prioritize the core backdrop over decorations if time runs short.
OSHA guidelines for safe event setup and worker protection
Installing a wedding ceremony backdrop transforms your venue and creates a focal point for photos and memories. Event Drape Rental provides pipe and drape solutions for weddings and other occasions. Request a quote , With proper planning and execution, your wedding backdrop will be the highlight of your ceremony.
Frequently Asked Questions
How long does it take to install a wedding ceremony backdrop?
Installation time depends on backdrop complexity, crew size, and venue setup. A standard wedding backdrop stand typically takes 30-60 minutes to assemble with two people, plus an additional 20-30 minutes to hang drapes and secure decorative elements. Outdoor installations or custom configurations may require longer. Planning 90-120 minutes total ensures you have buffer time for adjustments and testing stability before guests arrive.
What's the best way to keep a wedding backdrop stand stable?
Ensure all base plates are level and fully seated on the floor. Tighten all fasteners and connectors securely, use a wrench to verify clamps are snug. For outdoor events or high-traffic venues, use sandbags or weighted bases on each foot. Check that the stand doesn't rock by applying gentle pressure from multiple angles. If your venue allows, secure the frame to the wall or floor with approved anchoring methods. Inspect stability before hanging heavy drapes or floral arrangements.
Can you install a wedding backdrop without damaging the venue?
Yes, most wedding backdrop stands are non-invasive and require no permanent installation. They sit freely on the floor without drilling, nailing, or adhesives. However, always check with your venue about weight limits, floor protection requirements, and any restrictions on where you can position the frame. Use protective floor pads under base plates to prevent scuffing. For venues with delicate surfaces, lay plywood sheets under the stand. Coordinate with venue management before installation to confirm their specific guidelines and any liability requirements.
How do you attach fabric to a wedding backdrop stand without it slipping?
Use clamps, clips, or velcro strips designed for drape fabric to secure panels firmly to the crossbar. Start at the center top and work outward, ensuring even tension across the width. Pull the fabric taut but not so tight that it distorts. For heavier fabrics or longer drops, use multiple attachment points along the crossbar. Test the fabric by gently tugging it to confirm it won't shift during the ceremony. Avoid relying solely on gravity, proper fastening prevents sagging and movement that can look unprofessional during your event.