 how-to
Pipe and Drape Setup Tips for Weddings
Table of Contents
- Understanding Pipe and Drape Systems for Weddings
- Planning Your Layout: Venue Dimensions and Ceiling Height
- Pipe and Drape Setup Instructions: Step-by-Step Installation
- Pipe and Drape Fabric and Height Guide
- Wedding Pipe and Drape Backdrop Ideas and Design
- Pipe and Drape Safety and Stability Essentials
- Equipment Checklist and Troubleshooting Common Setup Issues
- Frequently Asked Questions
Last Updated: October 4, 2026
Understanding Pipe and Drape Systems for Weddings
A pipe and drape setup is a modular system of metal pipes, uprights, and fabric panels that transform any event space. It creates backdrops, divides rooms, and covers unattractive walls with customizable drapery. The system is flexible enough for DIY installation or professional setup, making it ideal for weddings, corporate events, and trade shows.
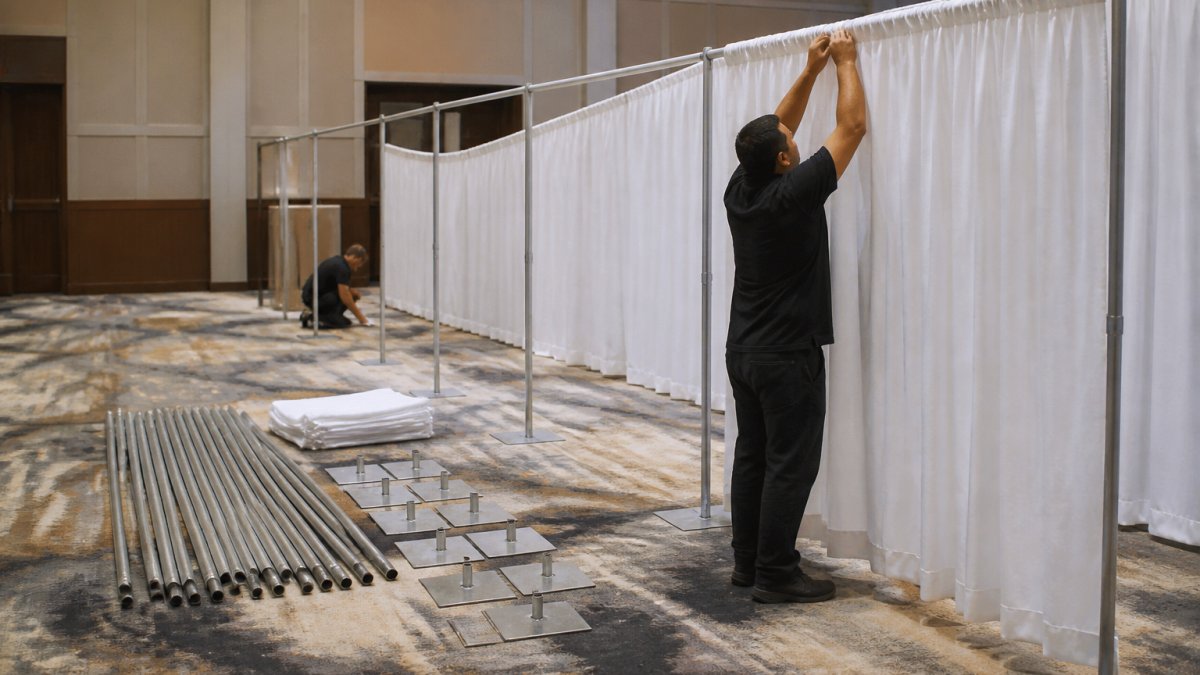
The basic components are simple:
- Metal uprights (vertical supports)
- Crossbars (horizontal connectors)
- Base plates (weighted feet for stability)
- Fabric panels (the visible drapery)
This modular design means you can adjust height, width, and coverage to fit your exact needs. A small intimate wedding needs different dimensions than a large reception hall. The pipe and drape system adapts to you, not the other way around.
Planning Your Layout: Venue Dimensions and Ceiling Height
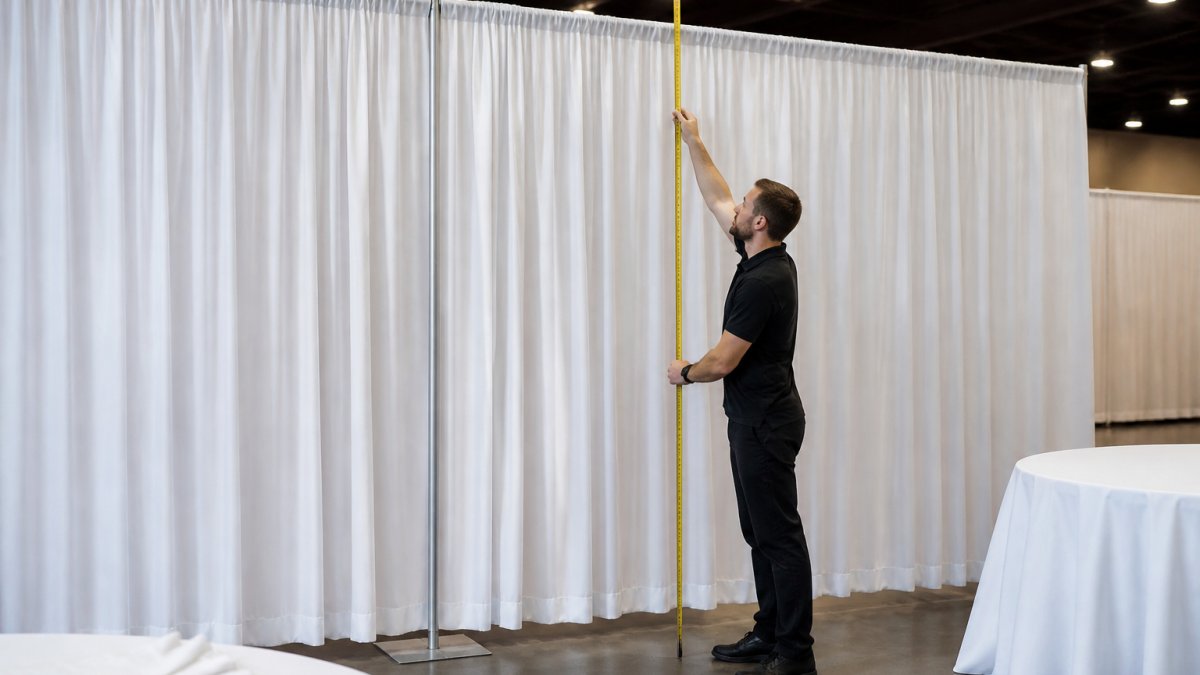
Before you buy or rent, measure your venue carefully to calculate exact quantities needed.
Essential Measurements
Measure: ceiling height, wall length, desired drape length, architectural obstacles (columns, beams, outlets, sprinkler heads), and floor surface type.
Calculating Upright Spacing and Quantities
Upright spacing depends on fabric weight and crossbar span. Standard spacing ranges from 4 to 8 feet apart:
- Lightweight fabrics (chiffon, tulle): 6-8 feet apart
- Medium-weight fabrics (polyester, standard satin): 4-6 feet apart
- Heavy fabrics (linen, velvet, blackout): 3-4 feet apart
To calculate the number of uprights needed:
- Measure the total width you want to cover (in feet).
- Divide by your chosen spacing interval.
- Add 1 to the result (you need uprights at both ends).
Example: A 20-foot-wide backdrop with medium-weight fabric at 5-foot spacing = (20 ÷ 5) + 1 = 5 uprights.
Calculating Fabric Panel Quantities
Fabric fullness, the ratio of fabric width to crossbar width, determines how many panels you need. Professional installations typically use 50 percent fullness (fabric is 1.5 times the crossbar width) for elegant folds.
- Measure your total crossbar width (the span between the first and last upright).
- Multiply by 1.5 for 50 percent fullness.
- Divide by your panel width (most rental panels are 4, 5, or 10 feet wide).
- Round up to the nearest whole number.
Example: A 20-foot crossbar span with 50 percent fullness = 20 × 1.5 = 30 feet of fabric needed. Using 10-foot-wide panels: 30 ÷ 10 = 3 panels.
For 75 percent fullness (luxe look), multiply by 1.75; for 25 percent fullness (sleek look), multiply by 1.25.
Accounting for Base Plate Footprint
Each base plate extends 12-18 inches from the upright. In tight spaces, reduce spacing or use smaller base plates. Always leave at least 3 feet of clear space around base plates for guest traffic and emergency exits.
Ceiling Height and Drape Length
Match drape height to ceiling: 8-10 ft ceilings use 8-10 ft drapes; 12-14 ft use 10-14 ft; 16-20 ft use 14-18 ft; 20+ ft use 18-30 ft. Always leave 1-2 feet clearance from floor.
Creating a Scaled Floor Plan
Sketch your layout to scale, marking upright positions, base plate footprints, traffic flow, obstacles, and decor placement. This prevents surprises on setup day.
Venue-Specific Constraints
Confirm with your venue: load limits, ceiling attachment options, fire code requirements, and setup/teardown windows. A brief conversation prevents costly changes.
Pipe and Drape Setup Instructions: Step-by-Step Installation
Follow these steps for a stable, attractive installation.
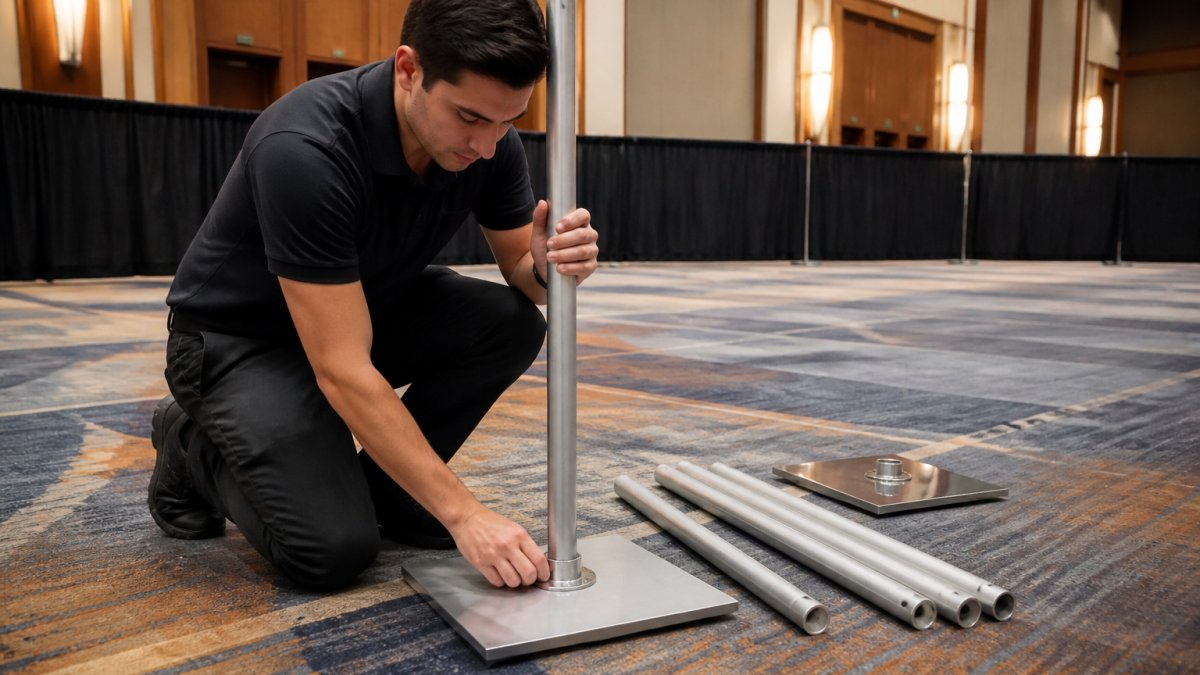
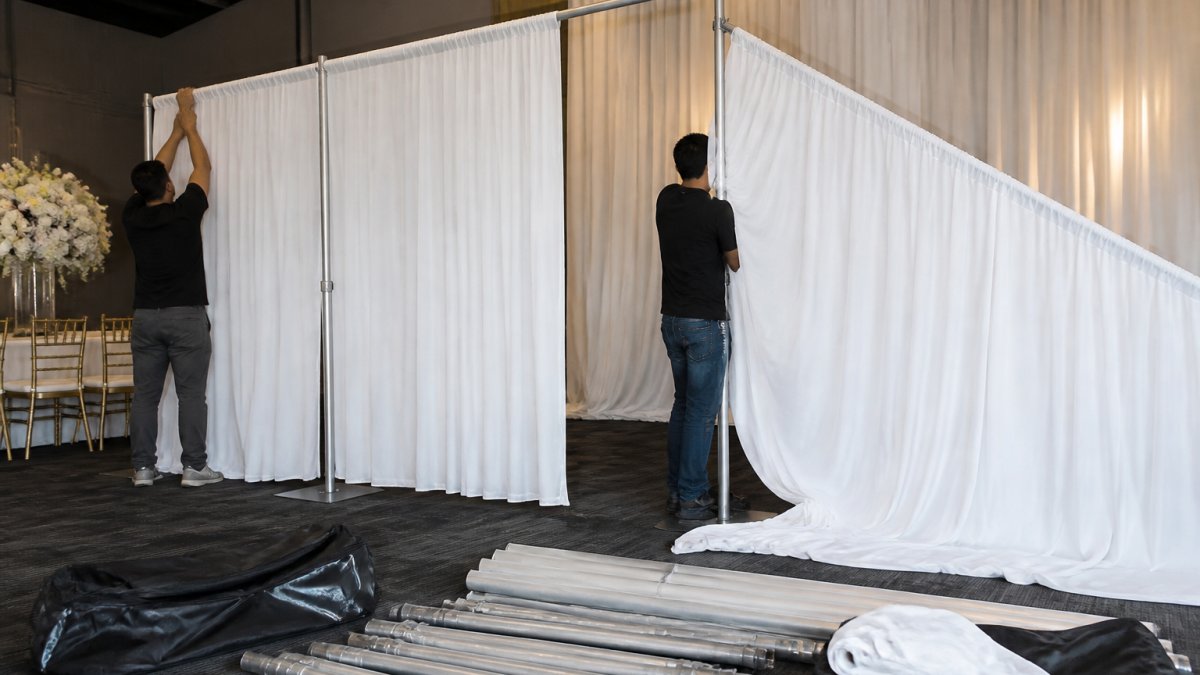
Step 1: Position base plates level and spaced 4-6 feet apart. Insert uprights and verify vertical alignment with a level.
Step 2: Slide crossbars into uprights at desired height (typically 8-12 feet). Ensure connections are tight.
Step 3: Prepare fabric panels, removing wrinkles with a steamer if needed.
Step 4: Attach fabric to crossbar using clips or clamps. Pull taut but leave slack for natural folds.
Step 5: Use 50 percent fabric fullness (1.5× crossbar width) for elegant folds. Gather evenly.
Step 6: Verify uprights are vertical, crossbars level, and fabric hangs straight.
Step 7: Add uplights, flowers, or decor. DIY installations take 2-4 hours; professional crews complete in 1-2 hours.
Pipe and Drape Fabric and Height Guide
Fabric choice affects not only aesthetics but also durability, maintenance, cost, and how the backdrop photographs. This section covers fabric types, height selection, and the practical trade-offs between them.
Fabric Types, Appearance, and Durability
- Chiffon: Lightweight, romantic, ethereal. Wrinkles easily; requires steaming. Best for photo backdrops.
- Tulle: Sheer, delicate, layered. Very lightweight; requires frequent uprights. Best for ceremonies.
- Satin: Luxurious, photographs beautifully. Heavier, more expensive. Best for formal receptions.
- Polyester: Durable, wrinkle-resistant, affordable. Less luxurious appearance. Best for budget-conscious or DIY setups.
- Linen: Natural texture, sophisticated. Wrinkles naturally. Best for rustic or garden weddings.
- Velvet: Dense, luxurious, dramatic. Very heavy; requires strong bases. Best for evening events.
- Blackout: Opaque, hides background. Heavy; requires strong bases. Best for venue transformation.
Fabric Weight and Its Effect on Installation
Fabric weight directly affects your base plate selection, upright spacing, and installation difficulty:
| Fabric Type | Weight per Sq. Yard | Recommended Upright Spacing | Base Plate Weight Needed | Wrinkle Resistance | Maintenance |
|---|---|---|---|---|---|
| Chiffon | 2-3 oz | 6-8 feet | 15-20 lbs | Low | Steaming required |
| Tulle | 1-2 oz | 6-8 feet | 15-20 lbs | Low | Gentle handling |
| Polyester | 4-6 oz | 4-6 feet | 20-25 lbs | High | Minimal |
| Satin | 5-8 oz | 4-5 feet | 25-30 lbs | Medium | Occasional steaming |
| Linen | 6-10 oz | 4-5 feet | 25-30 lbs | Low | Steaming or pressing |
| Velvet | 10-14 oz | 3-4 feet | 30-35 lbs | High | Gentle brushing |
| Blackout | 8-12 oz | 3-5 feet | 25-35 lbs | High | Minimal |
Height Selection by Venue and Purpose
Drape height should match your venue proportions and design goal:
Intimate Ceremonies (8-10 foot drapes)
- Best for: Small venues, low ceilings (8-10 feet), or creating a cozy atmosphere.
- Effect: Frames the couple without overwhelming the space. Works well for elopements or small family weddings.
- Ceiling requirement: Minimum 9-11 feet to allow 1-2 feet of clearance above drapes.
Standard Receptions (10-14 foot drapes)
- Best for: Hotel ballrooms, typical reception halls, photo backdrops.
- Effect: Balanced proportions that suit most wedding styles. Creates a polished, professional appearance.
- Ceiling requirement: 12-16 feet. This is the most common choice and works in 80 percent of venues.
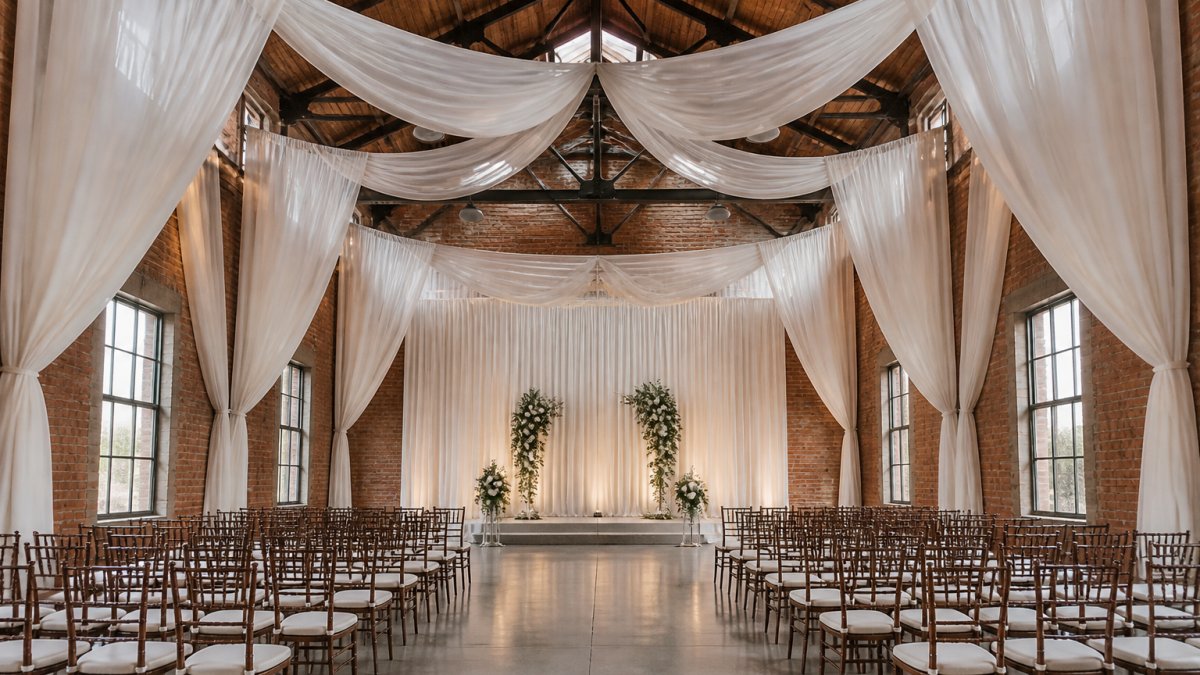
Dramatic Ceremonies (16-20 foot drapes)
- Best for: High-ceiling venues (16-22 feet), grand entrances, or creating visual drama.
- Effect: Draws the eye upward, creates a sense of grandeur, and suits formal or luxe weddings.
- Ceiling requirement: 18-24 feet. Requires taller uprights and heavier bases.
Statement Backdrops (20-30 foot drapes)
- Best for: Warehouse venues, outdoor tents with tall frames, or high-ceiling ballrooms (20+ feet).
- Effect: Creates a soaring, dramatic focal point. Suitable for large receptions or ceremony spaces where the backdrop is the primary design element.
- Ceiling requirement: 22-32 feet. Requires professional installation and heavy-duty equipment.
Color and Lighting Interaction
Fabric color appears different under various lighting conditions:
- Warm lighting enhances warm tones; cool lighting enhances cool tones. Uplighting transforms appearance; without it, drapes look flat. Always view fabric samples in your actual venue lighting before committing.
Cost Considerations by Fabric and Size
Typical 3-day rental pricing: polyester $3-8/linear foot, satin $5-12, specialty fabrics $8-15, blackout $6-10. A 20-foot-wide, 12-foot-tall polyester backdrop costs $180-480; satin costs $300-720. Purchasing is cost-effective only for multiple events; full systems cost $1,500-4,000.
Fabric Fullness and Visual Impact
Fabric fullness affects cost and appearance: 25 percent (1.25× width) is sleek and economical; 50 percent (1.5× width) is professional standard; 75 percent (1.75× width) is luxe and dramatic. For a 20-foot crossbar: 25 percent = 25 feet fabric, 50 percent = 30 feet, 75 percent = 35 feet.
Matching Fabric to Your Wedding Style
Match fabric to style: romantic/garden (chiffon, tulle, linen in pastels), modern (polyester/satin in neutrals), formal (satin/velvet in jewel tones), rustic (linen in warm neutrals), bohemian (layered chiffon in earth tones). Test your final choice in your actual venue before the wedding day.
Wedding Pipe and Drape Backdrop Ideas and Design
Popular designs: monochromatic elegance (single color), layered textures (mixed fabrics), color blocking (complementary colors), floral integration, and lighting effects.
Photo areas: Use 12-16 foot wide backdrops with flattering lighting.
Ceremony backdrops: Tall, dramatic designs (16-20 feet) with flowers or greenery.
Room division: 8-10 foot heights define spaces while maintaining sightlines. Test fabric choice in your actual venue lighting before committing.
Pipe and Drape Safety and Stability Essentials
Stability depends on proper setup, weight distribution, and venue conditions. Base plates (15-35 lbs) must counterbalance uprights and fabric. Uprights must be perfectly vertical; crossbar connections must be tight. Heavier fabrics require stronger bases and closer spacing. Ensure drapes don't contact ceiling fixtures, sprinkler heads, or HVAC vents. Confirm with your venue: floor surface, weight limits, fire code requirements, and fastening restrictions. Test your installation with actual fabric weight before the event.
Equipment Checklist and Troubleshooting Common Setup Issues
A complete pipe and drape installation requires specific equipment. Use this checklist to ensure you have everything.
| Item | Quantity | Purpose |
|---|---|---|
| Base plates | 1 per upright | Weighted foundation |
| Uprights | As needed for width | Vertical supports |
| Crossbars | 1 per upright pair | Horizontal connector |
| Fabric panels | As needed for coverage | Visible drapery |
| Hanging clips or clamps | 1 per 12 inches of width | Fabric attachment |
| Level tool | 1 | Verify vertical/horizontal alignment |
| Measuring tape | 1 | Verify dimensions |
| Fabric steamer | 1 (optional) | Remove wrinkles |
| Uplights | As desired | Accent lighting |
Troubleshooting Common Issues:
Problem: Uprights lean or wobble Fix: Check base plate weight and floor surface. Add shims if floor is uneven. Ensure crossbar connections are tight.
Problem: Fabric sags in the middle Fix: Add an extra upright to reduce span. Tighten fabric attachment points. Check that crossbars are level.
Problem: Wrinkles or creases in fabric Fix: Use a fabric steamer before hanging. Ensure fabric is pulled taut but not stretched during installation.
Problem: Fabric slips during installation Fix: Use secure clamps or clips rated for fabric weight. Check that hanging hardware is compatible with your crossbar type.
Problem: Uneven fabric gathering Fix: Measure panel width and divide by the number of gathering points. Space clips evenly. Adjust fabric gradually from one end.
Problem: Visible gaps between panels Fix: Overlap panels slightly during installation. Use matching fabric tape to hide seams. Adjust lighting to minimize shadows.
Problem: Base plates slide on smooth floors Fix: Use non-slip mats under base plates. Add weight if needed. Never install on polished floors without protection.
For larger installations or unfamiliar venues, professional installation eliminates guesswork. Event Drape Rental offers both DIY rental options and professional installation services.
A stunning wedding backdrop doesn't happen by accident. It requires careful planning, proper equipment, and attention to detail. Whether you're creating an intimate ceremony setting or transforming a reception hall, the right pipe and drape system delivers professional results.
Frequently Asked Questions
How do you set up pipe and drape for a wedding?
Start by measuring your venue dimensions and ceiling height to determine the support structure size. Assemble the base plates, uprights, and crossbars according to your layout plan. Hang fabric panels from the crossbar using clips or rings, adjusting fullness and gathering as needed. Secure all components to prevent movement, then add lighting, uplights, or floral arrangements to enhance the backdrop. Professional installation ensures proper stability and a polished appearance, while DIY setups work for simpler configurations if you follow safety guidelines carefully.
What size pipe and drape do I need for a wedding backdrop?
Measure your venue's ceiling height and the wall or area you want to cover. Pipe and drape systems range from 12 to 30 feet in height, so choose a size that fits your space without looking cramped or oversized. For a standard photo area or room divider, 10 to 15 feet wide and 8 to 12 feet tall works well for most weddings. Larger venues may need wider coverage or taller drapes. Request a quote with your venue dimensions to ensure the system matches your exact needs.
How do you keep pipe and drape stable and safe?
Stability depends on proper base plate weight, secure upright connections, and crossbar fastening. Ensure base plates are weighted or secured to the floor to prevent tipping. Check all bolts and connectors before hanging fabric. Never exceed the system's load limits, which vary by equipment type. Secure fabric panels firmly to the crossbar to prevent sagging or shifting. If your venue has high ceilings or requires tall drapes, professional installation is essential to meet safety standards and prevent accidents.
Can you set up pipe and drape yourself for a wedding?
DIY setup is possible for straightforward configurations in venues with standard ceiling heights and manageable dimensions. You'll need basic tools, clear instructions, and time to assemble components correctly. However, professional installation is recommended for complex layouts, high ceilings, or if you're unfamiliar with pipe and drape systems. Professional teams handle heavy lifting, ensure proper stability, and guarantee a polished finish. For rush timelines or high-profile events, professional installation reduces stress and eliminates setup errors.